SaabCentral Forums banner

DIY: Strut Replacement

41K views 60 replies 19 participants last post by  luddyludwick  
#1 ·
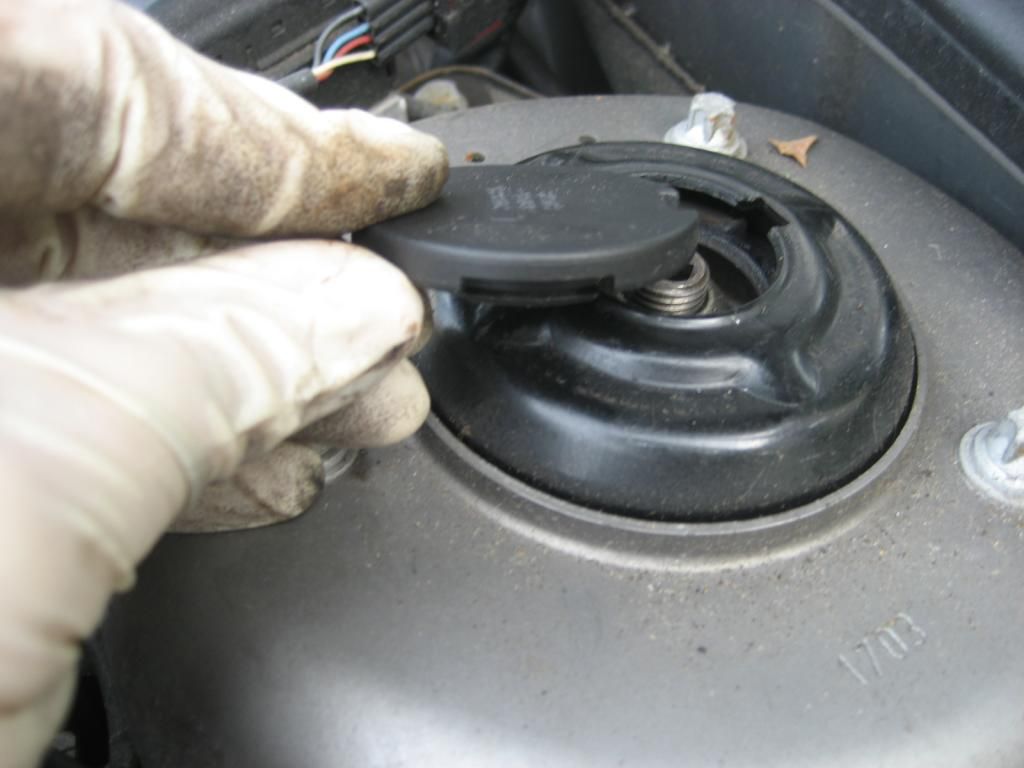
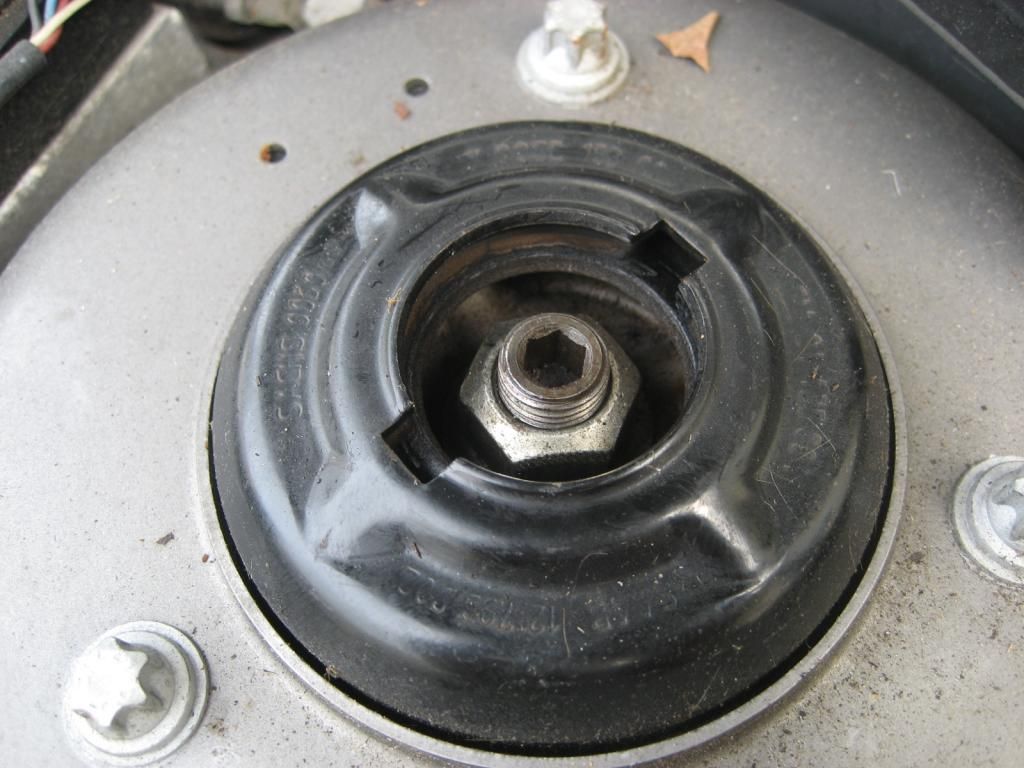
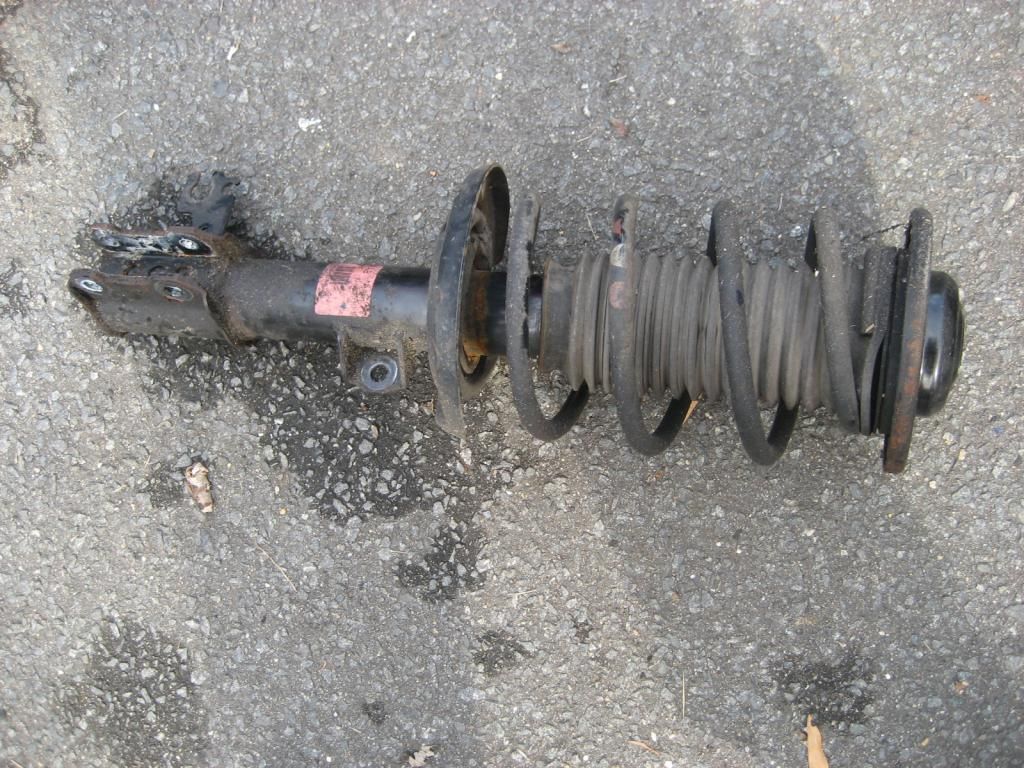
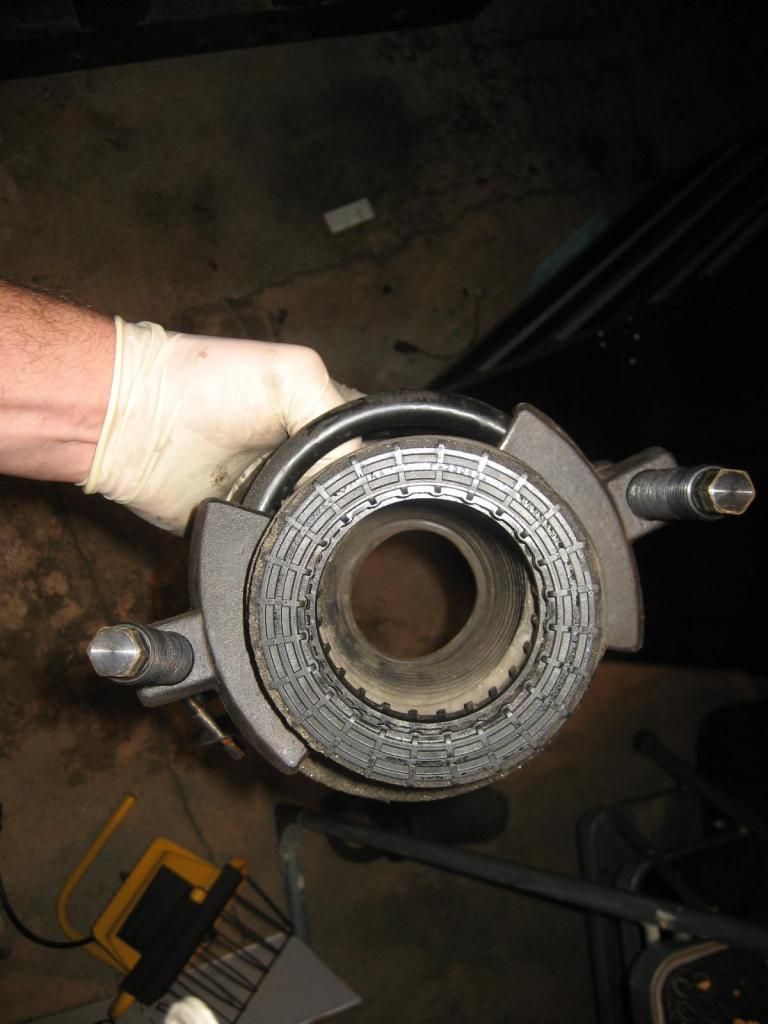
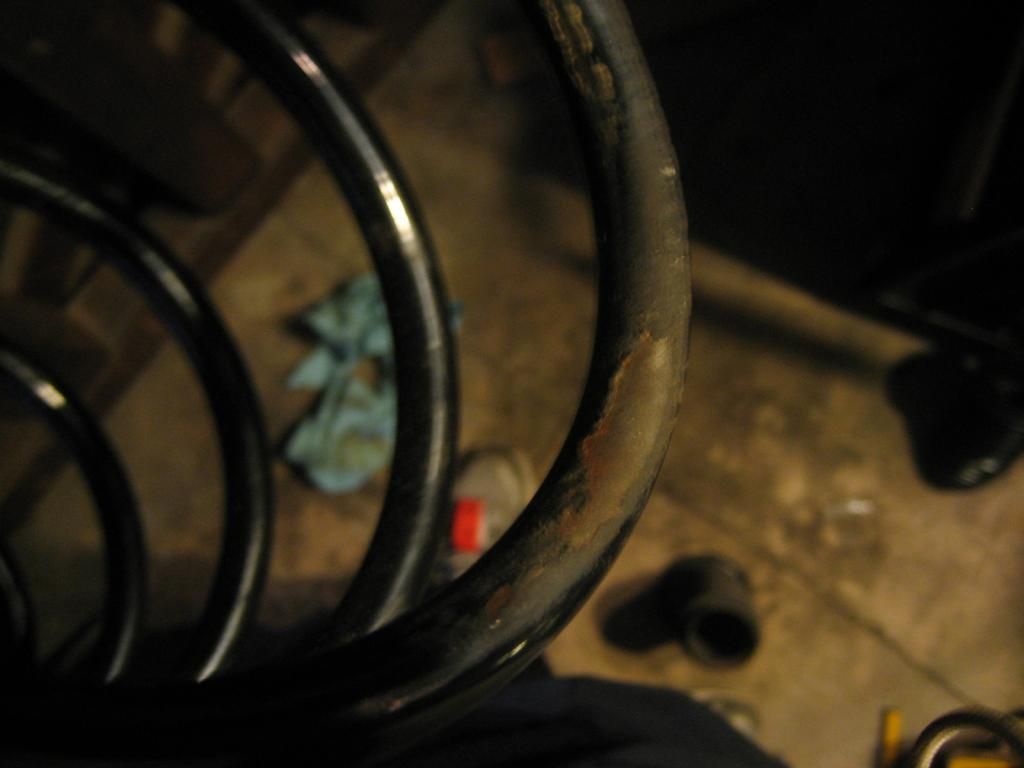
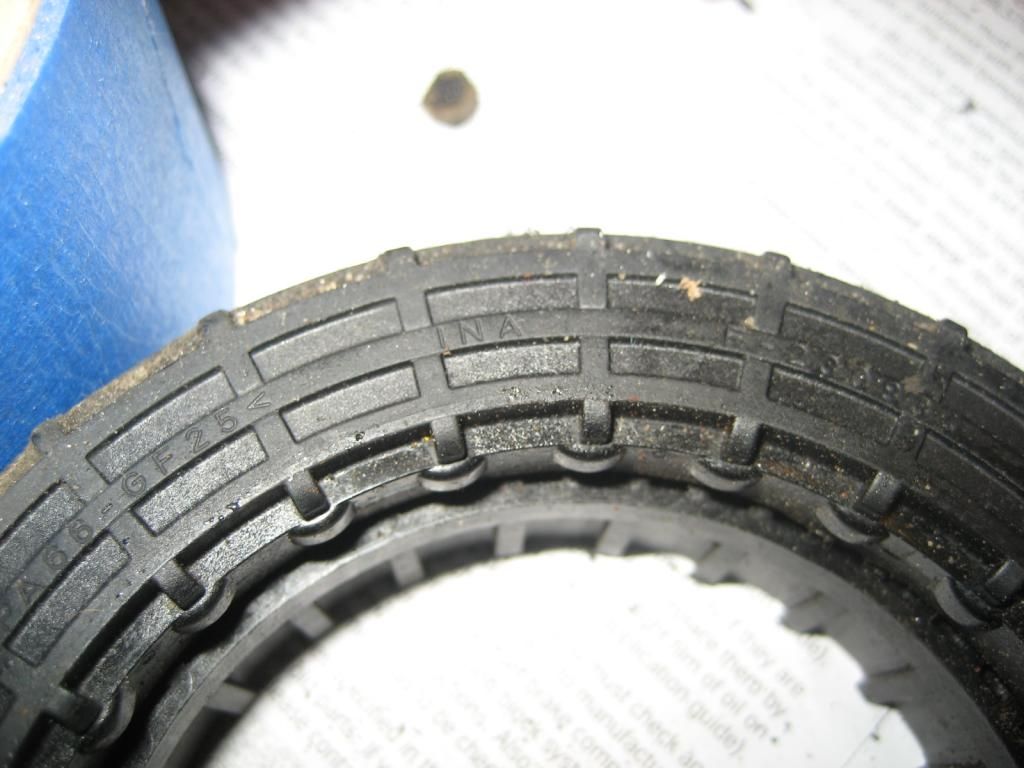
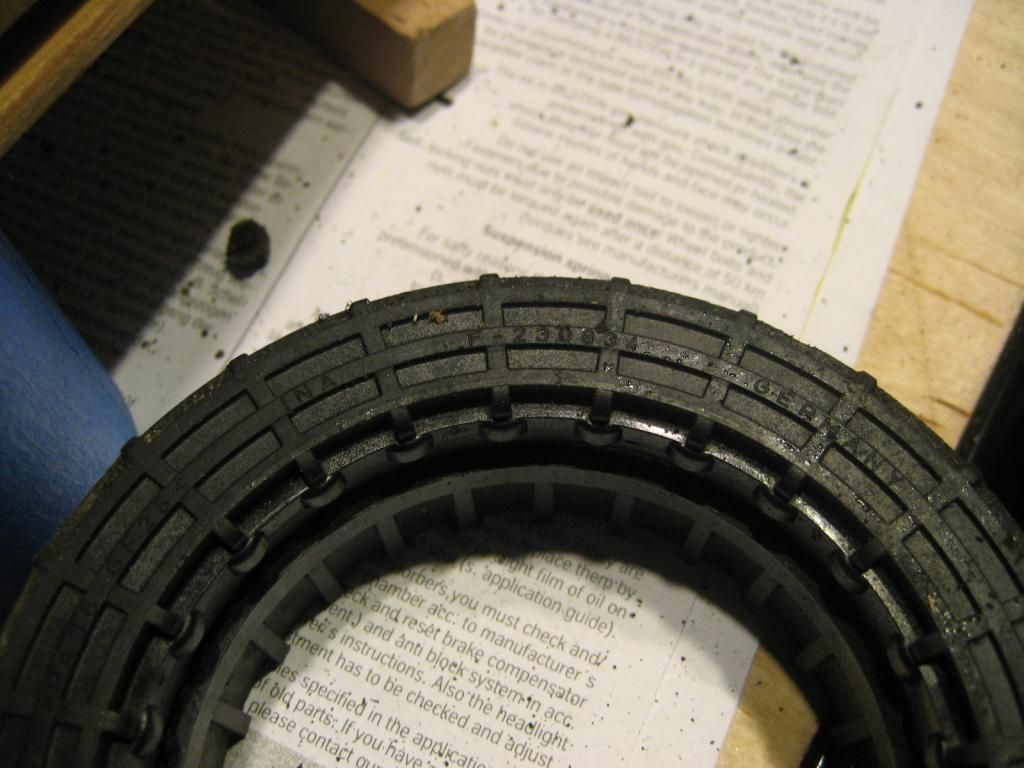
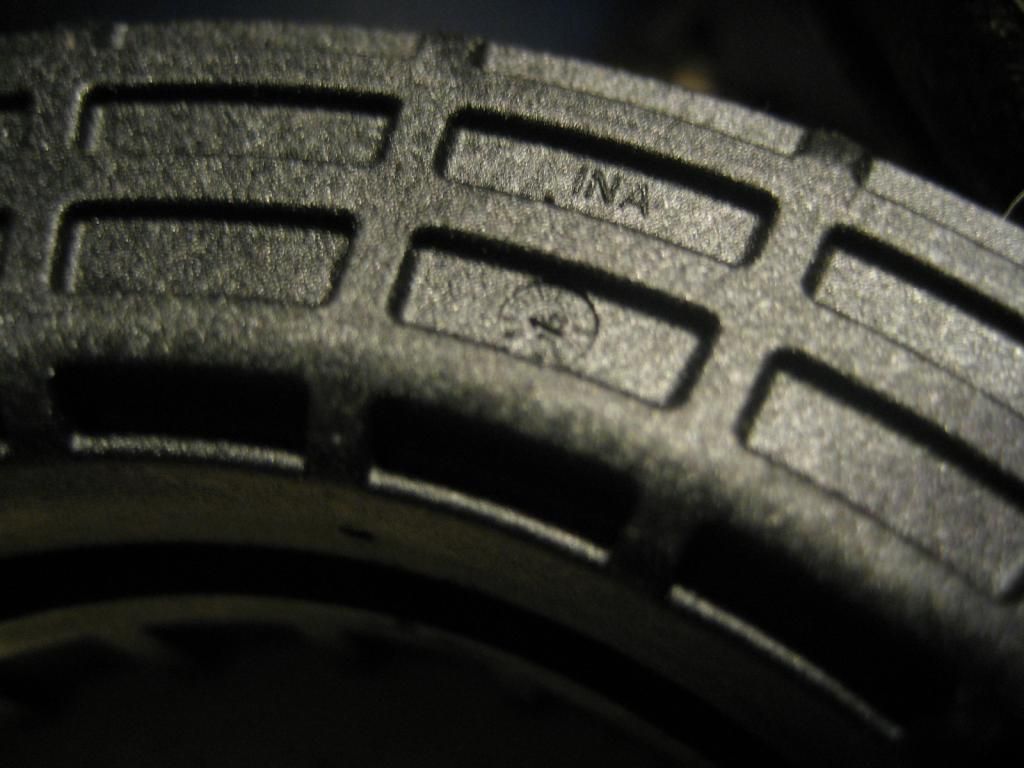
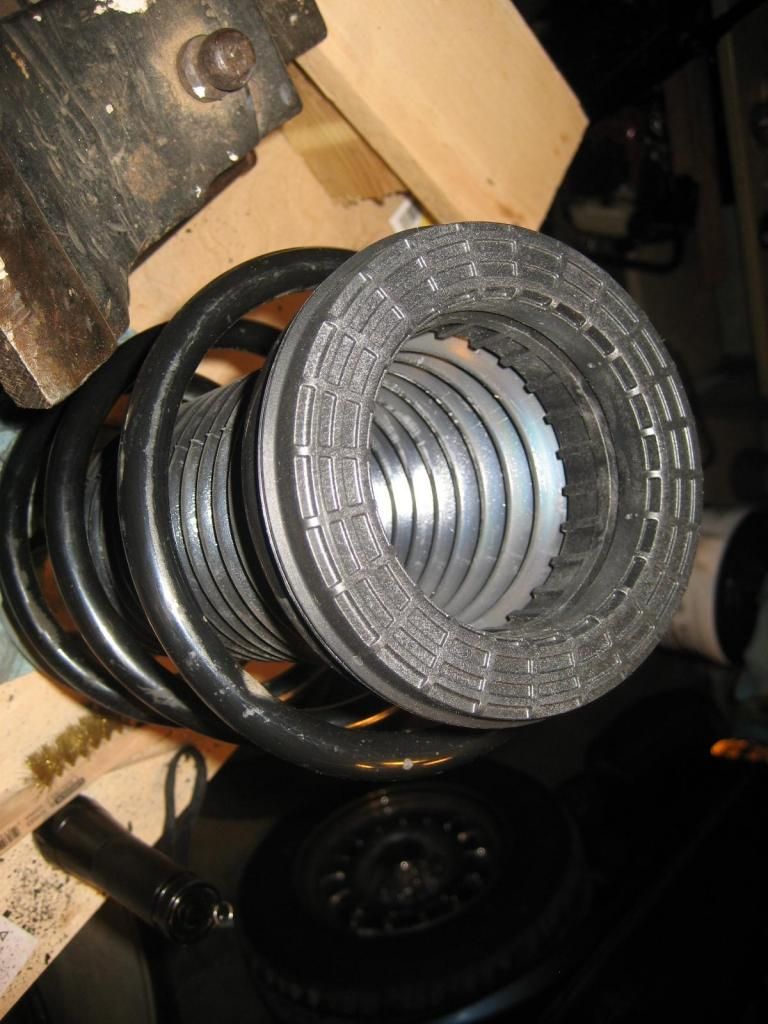
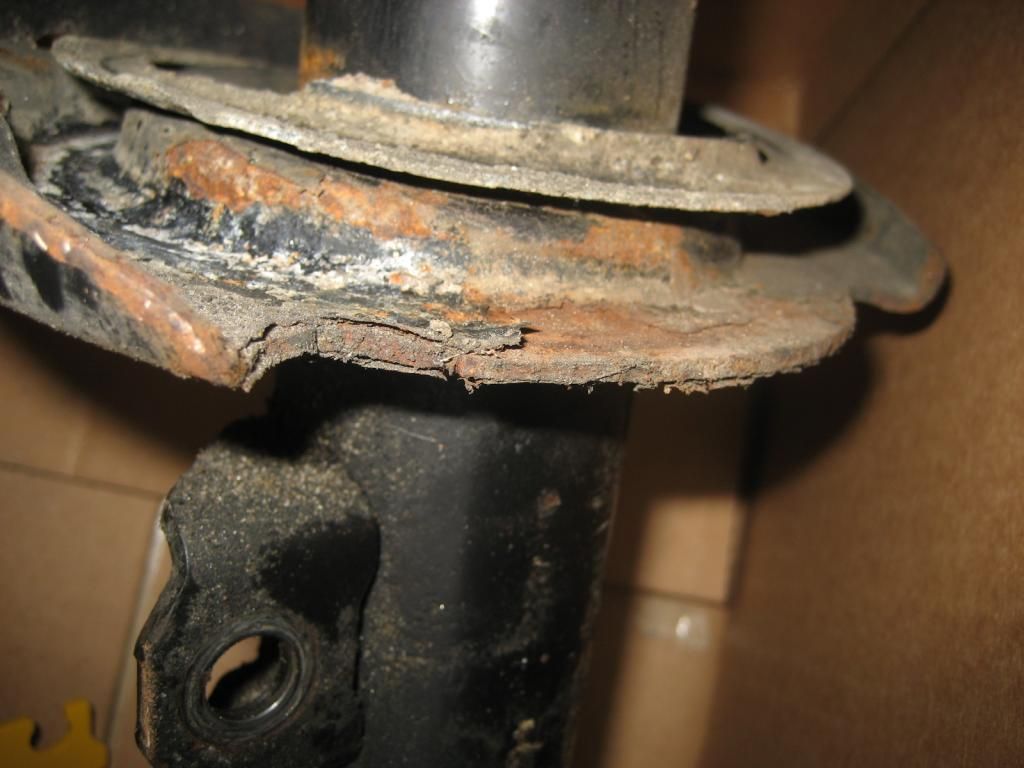
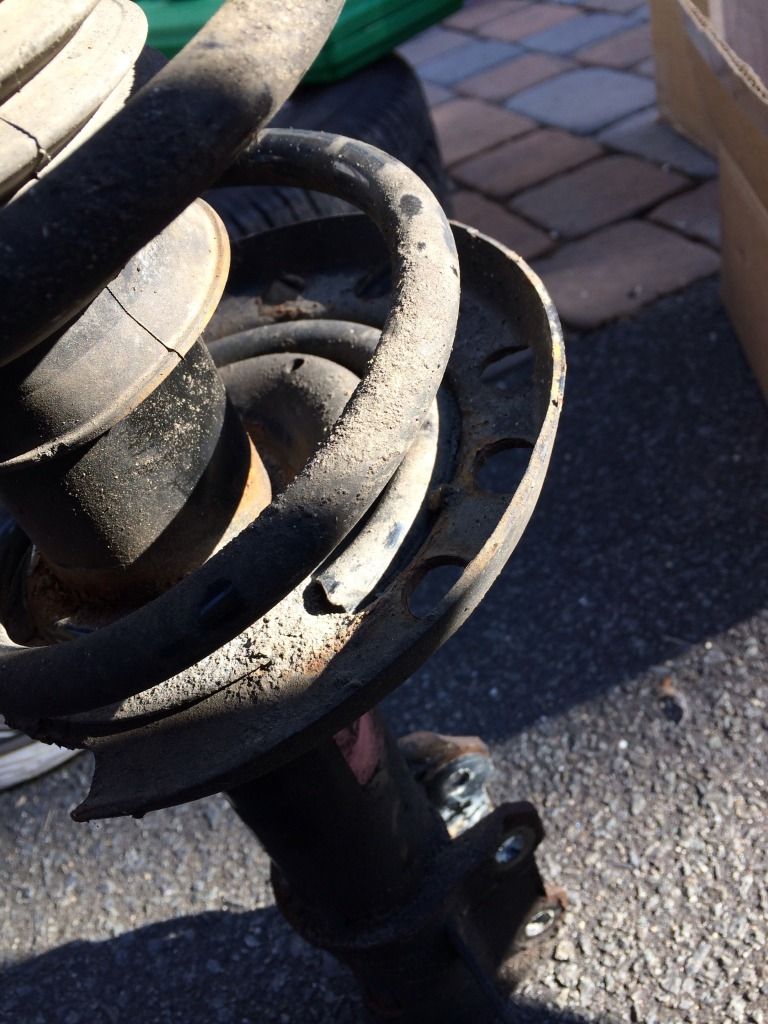
I needed to replace a strut bearing on my 2004 9-3 with 72k miles. Ive owned the car since new, and in the last few months, I noted the strut binding when turning to the right. Ive owned the car since new, and it hasnt gotten a ton of use in the last year or so. Ill also note that I did notice that during cold weather, going over bumps, I was getting a crunching sound which I thought was sway bar bushings, but it was the struts!!!

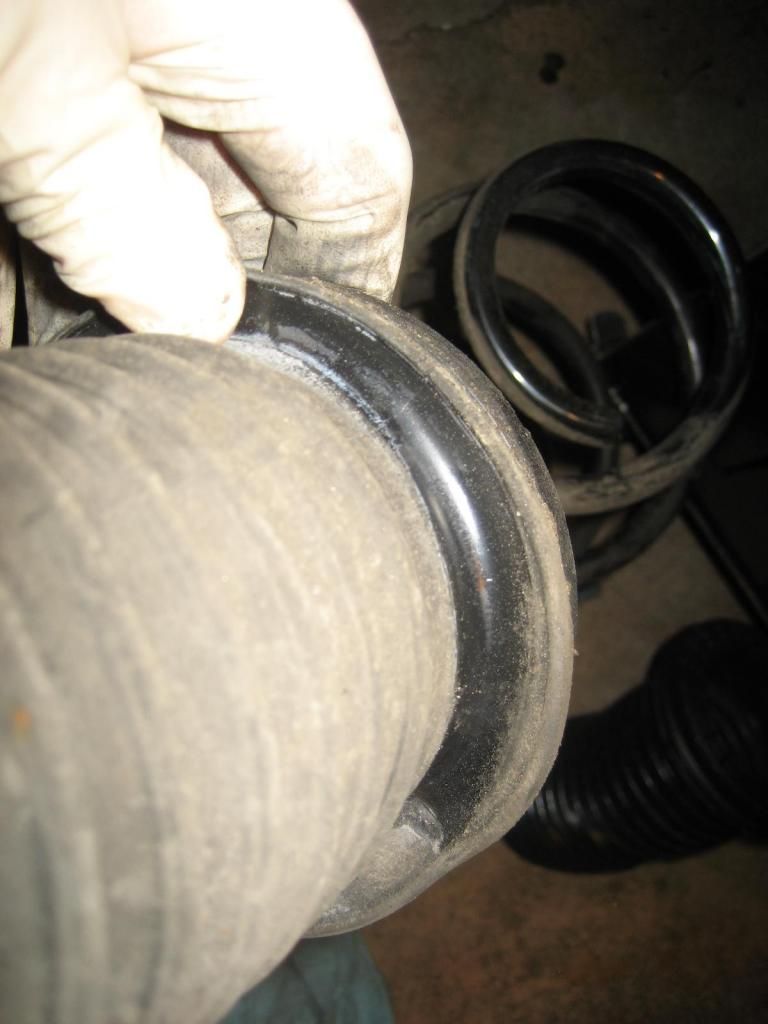
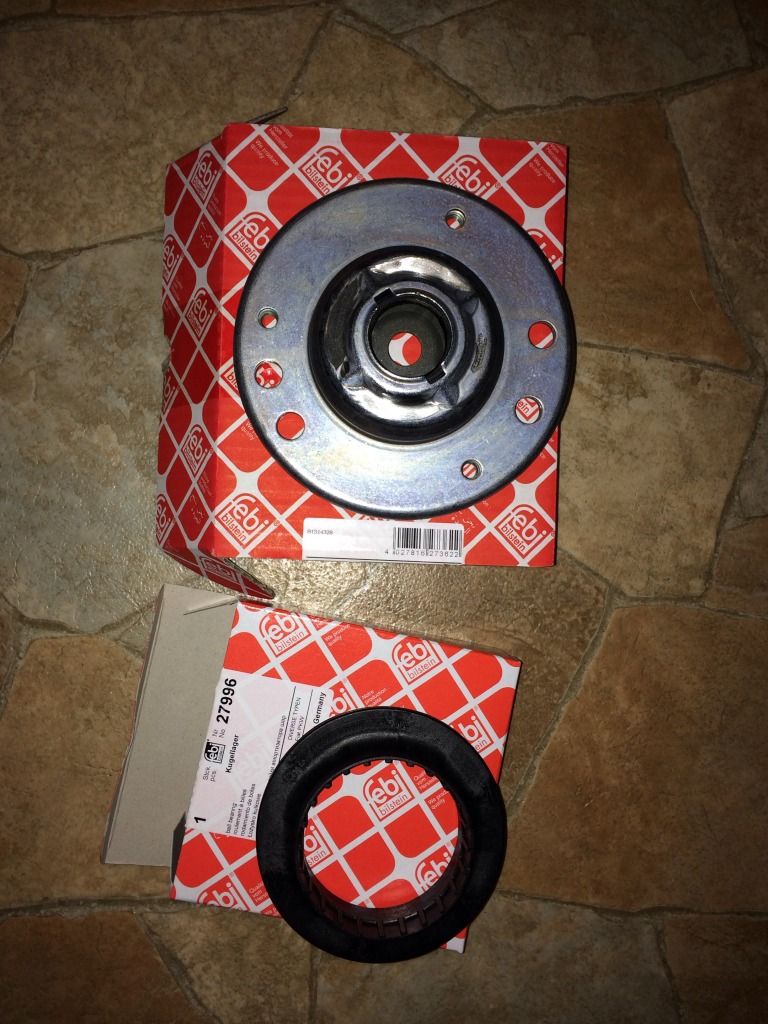
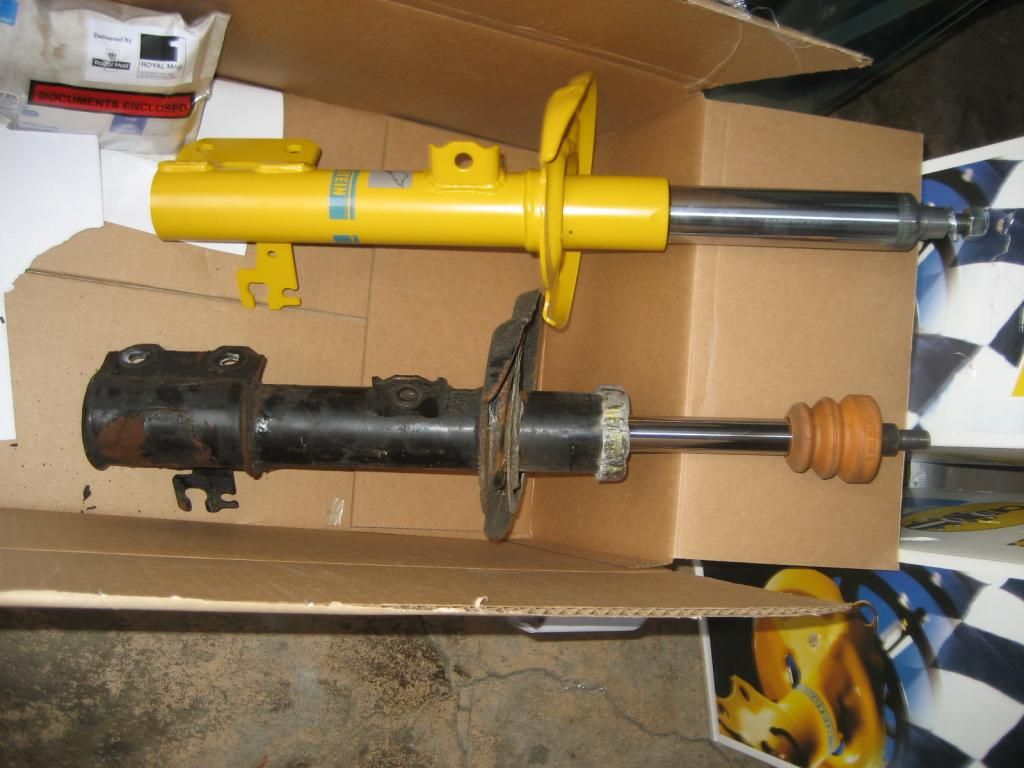
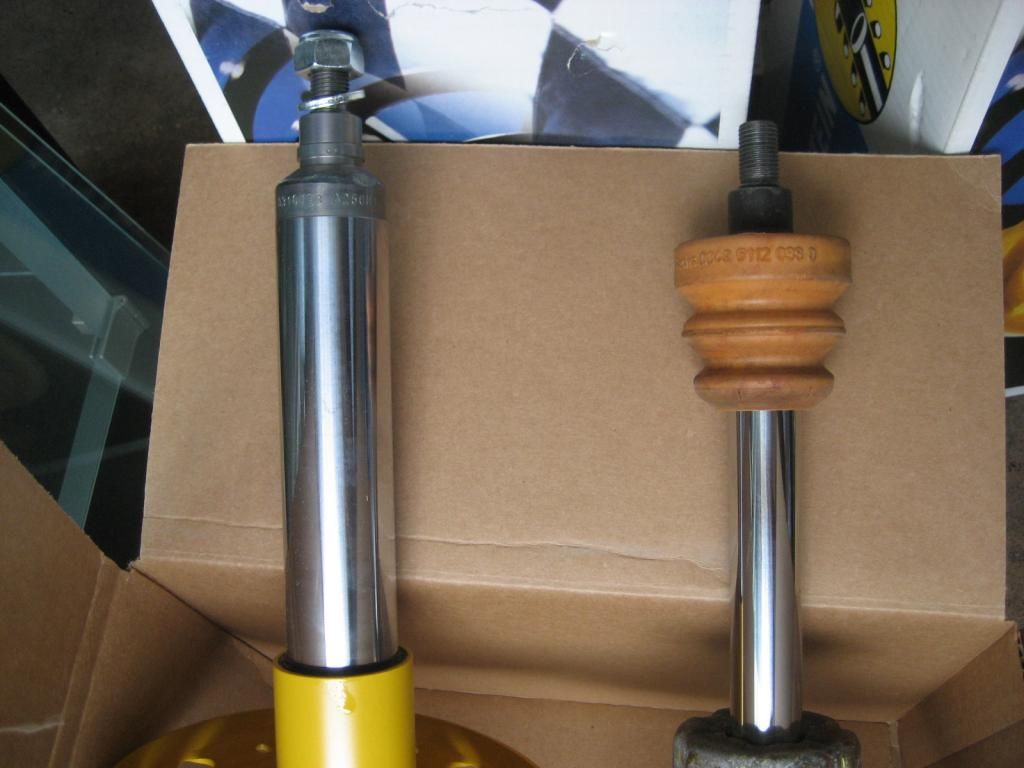
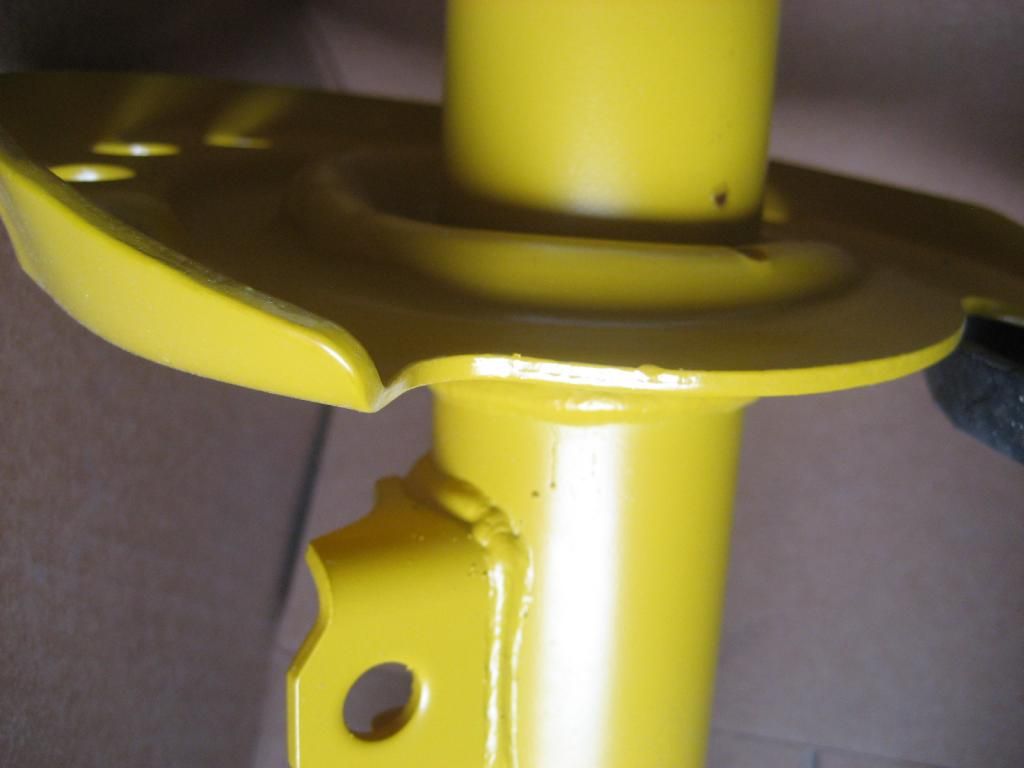
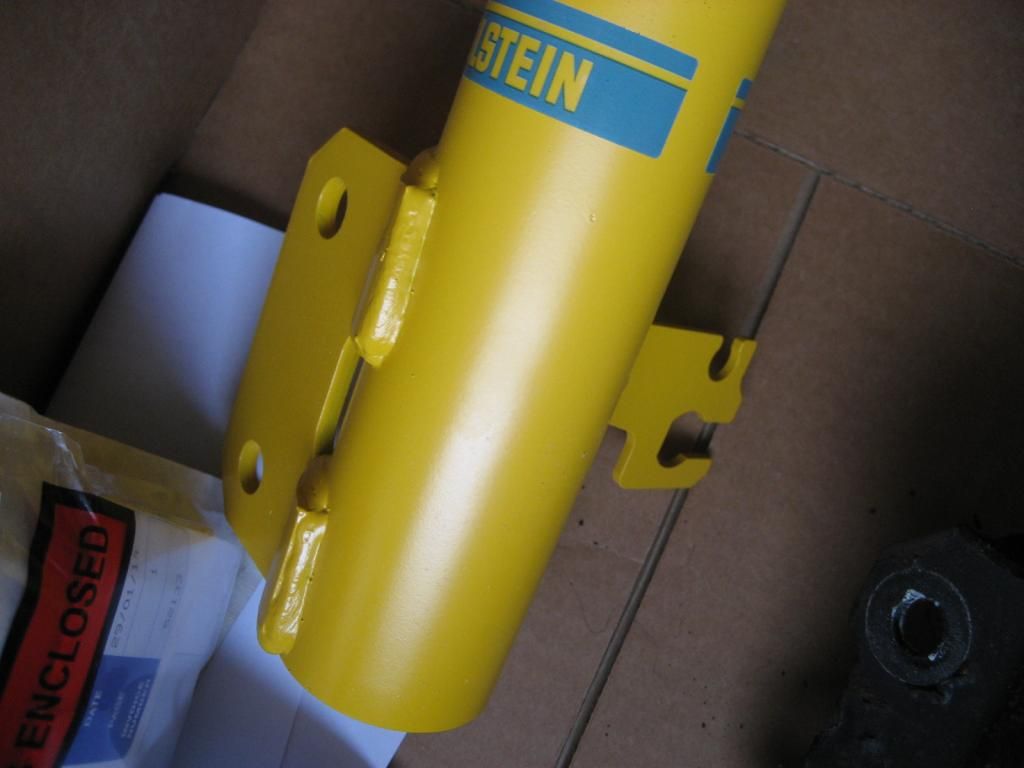
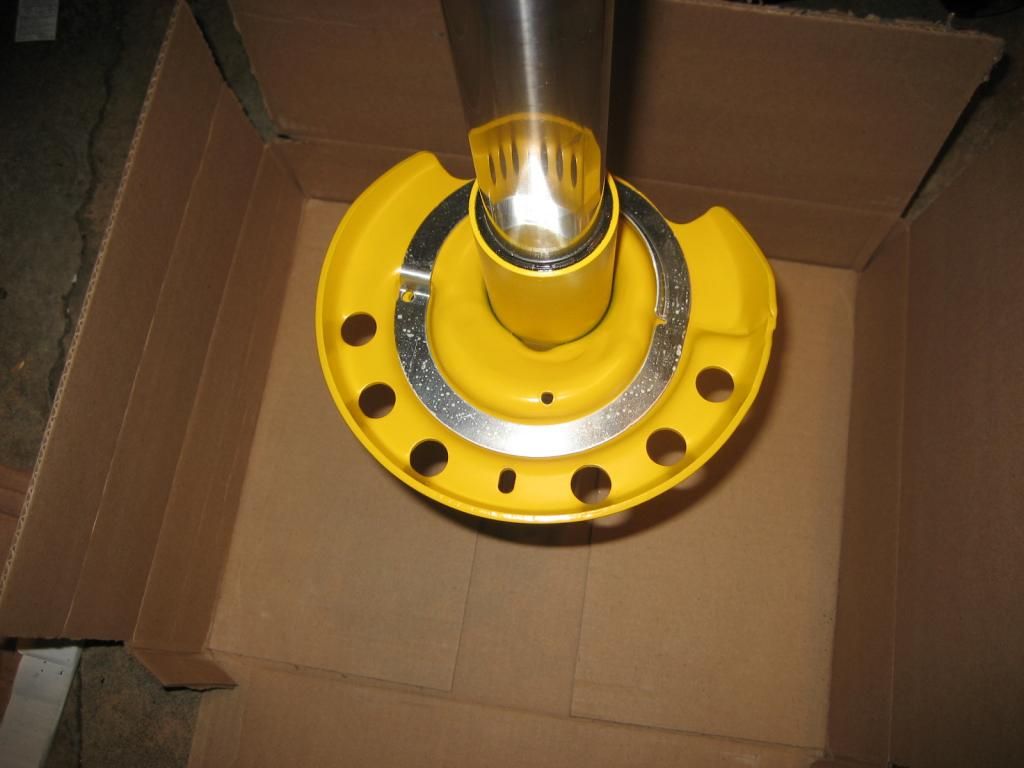
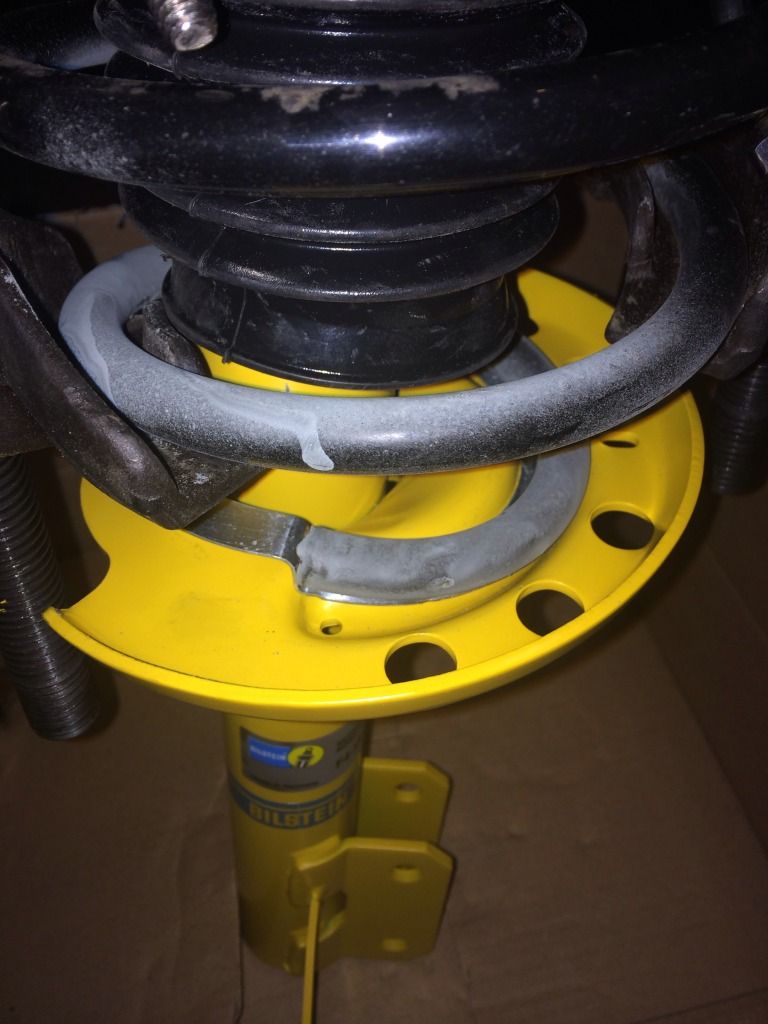
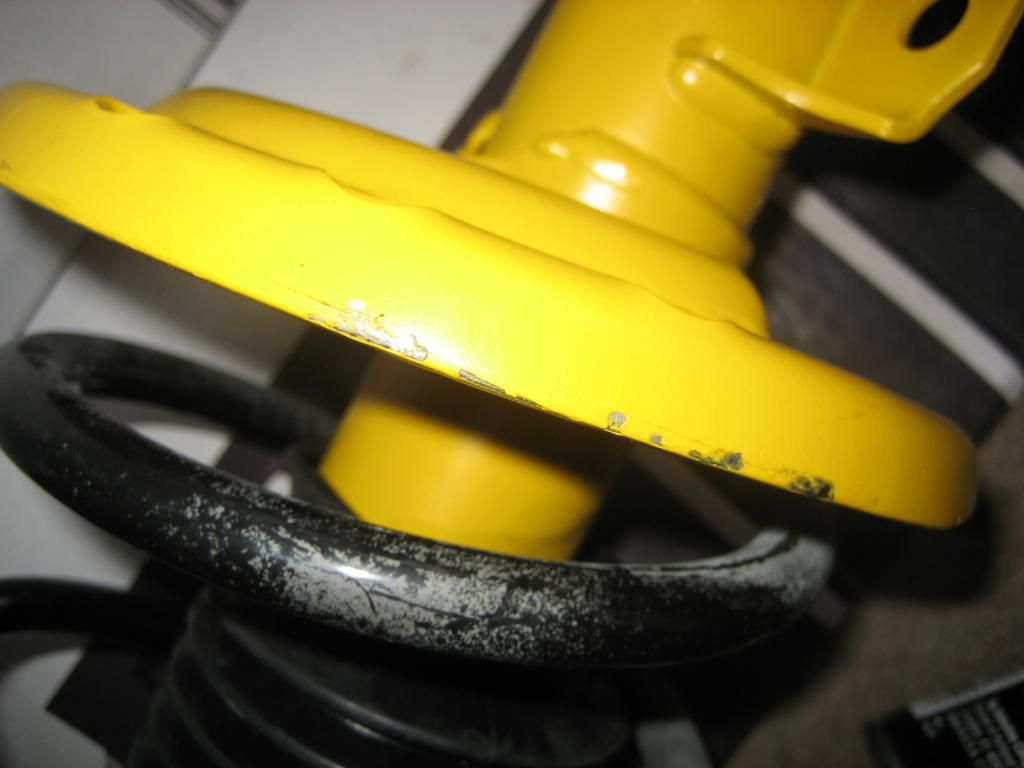
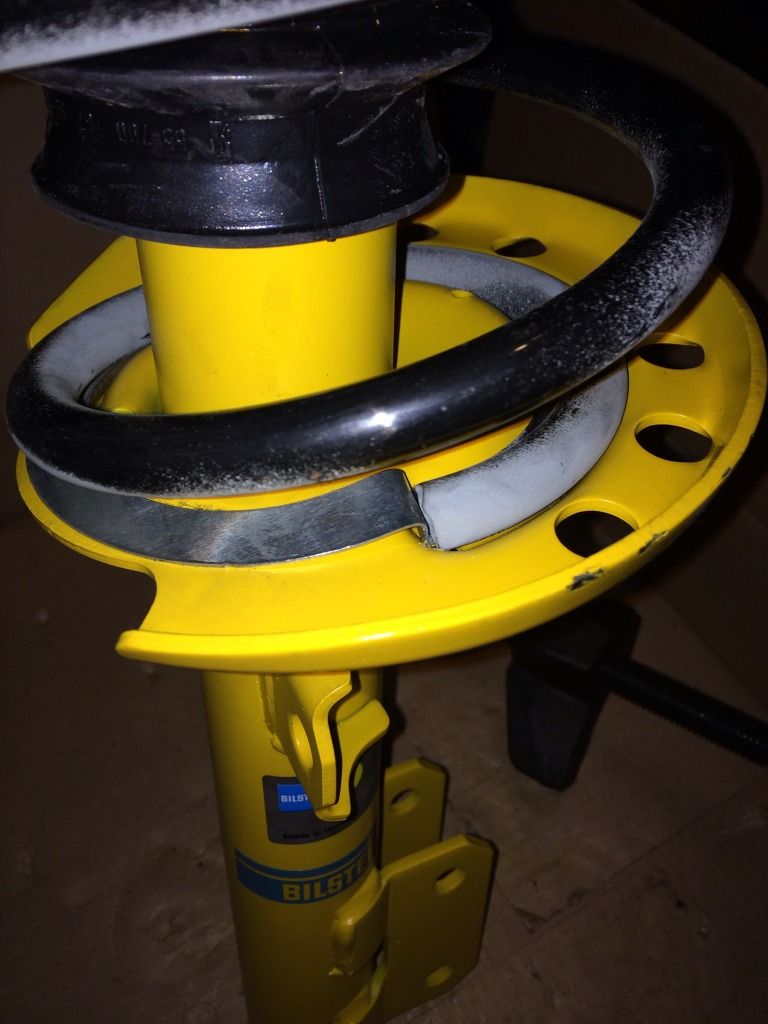
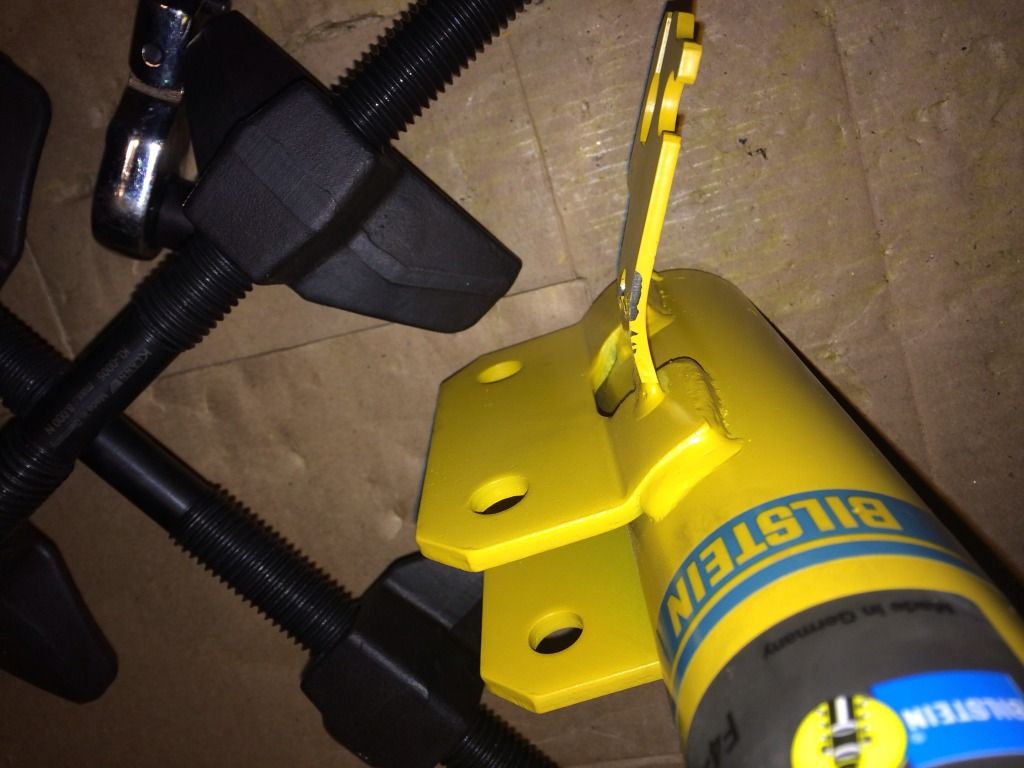
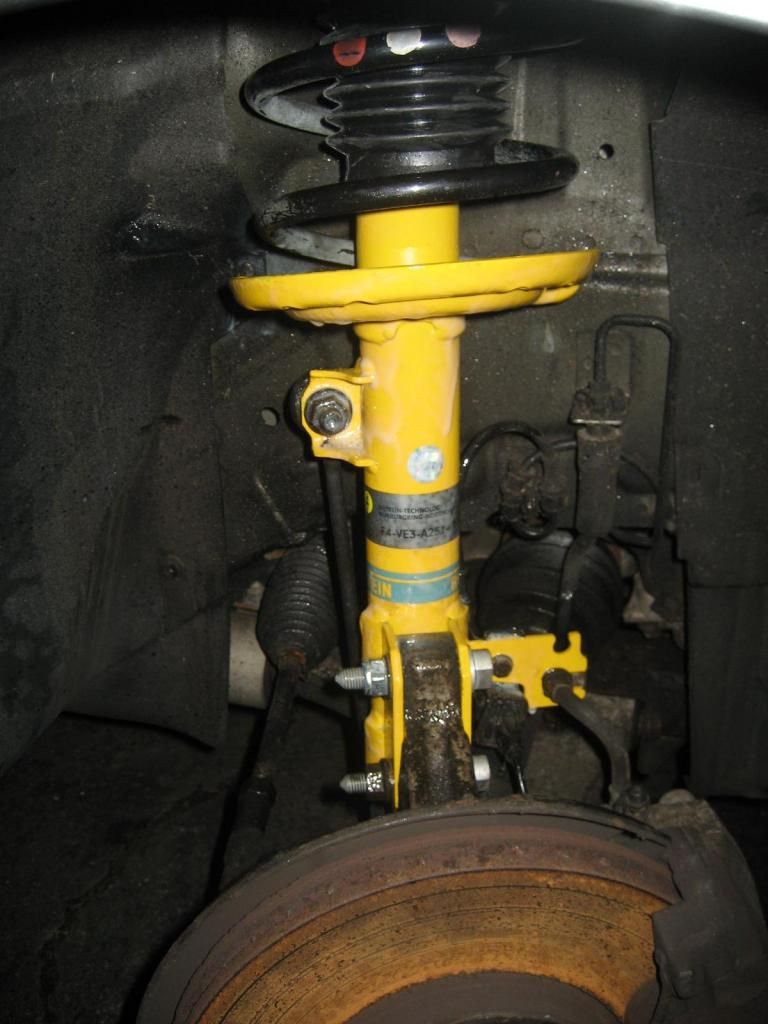
I replaced mine with Bilsteins, which are more expensive than the OE Sachs and aftermarket KYBs, but are IMO a better design. I replaced front struts as well as rear shocks. Ride is much better, and firm but not harsh as others have defined it.

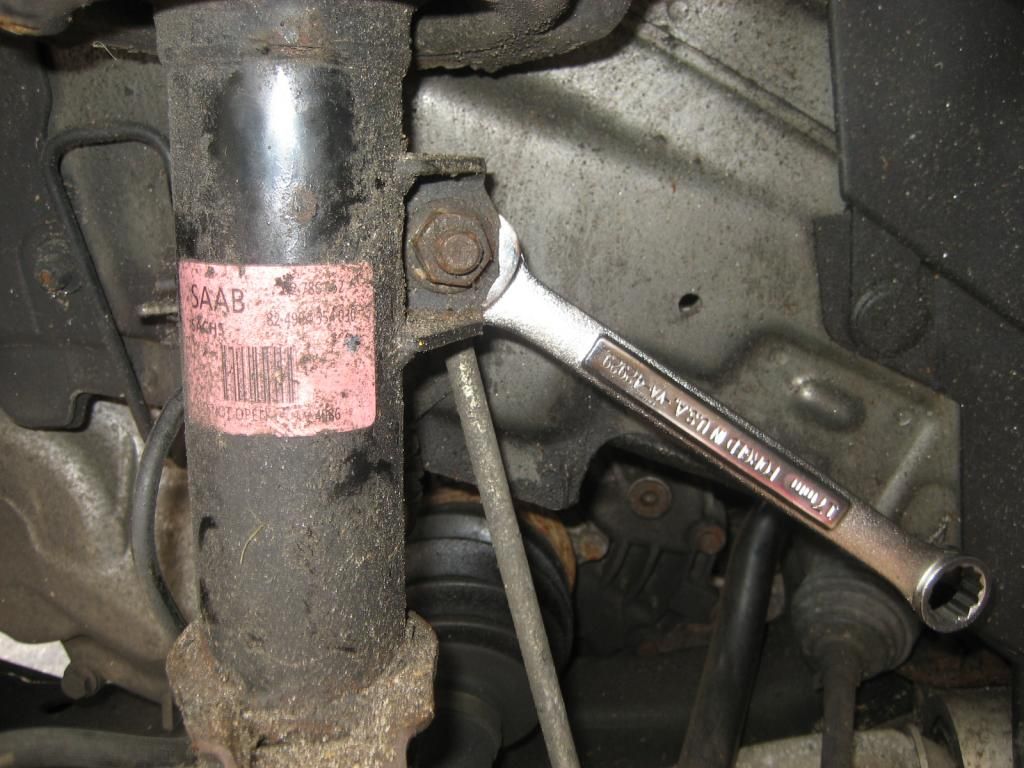
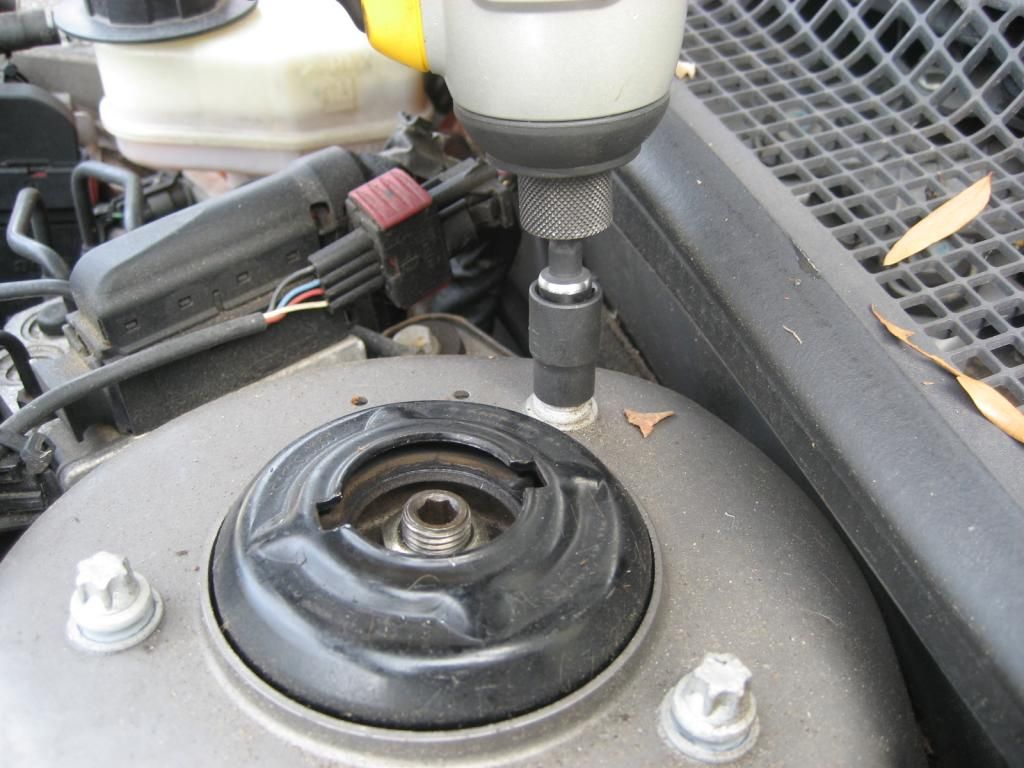
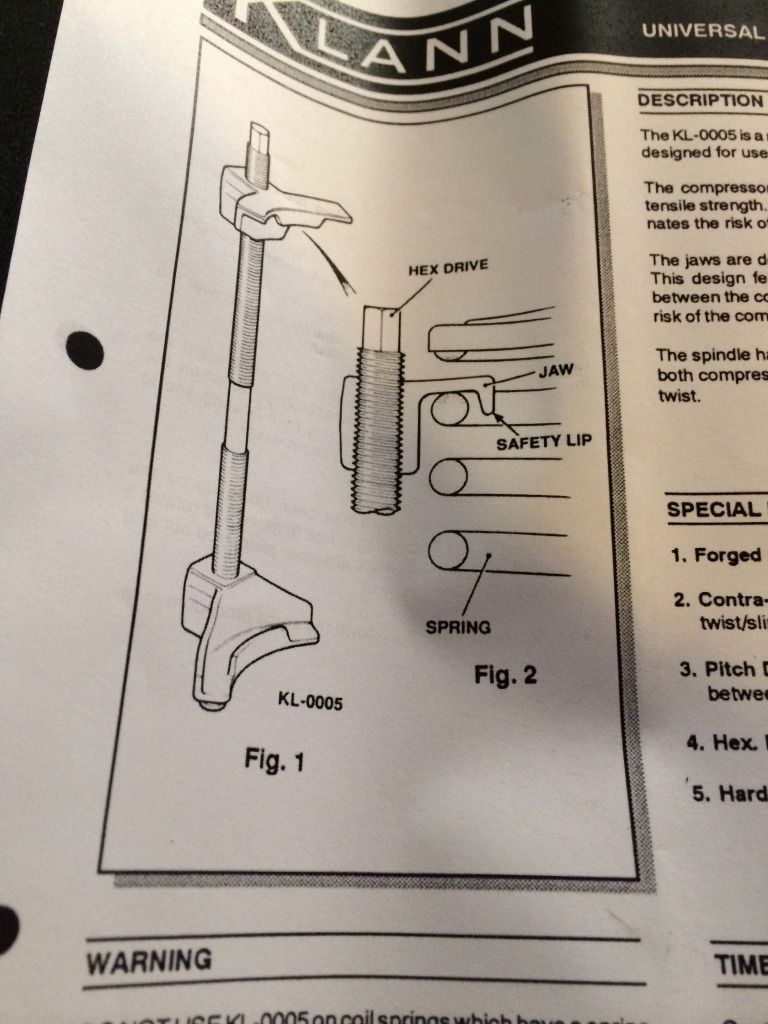
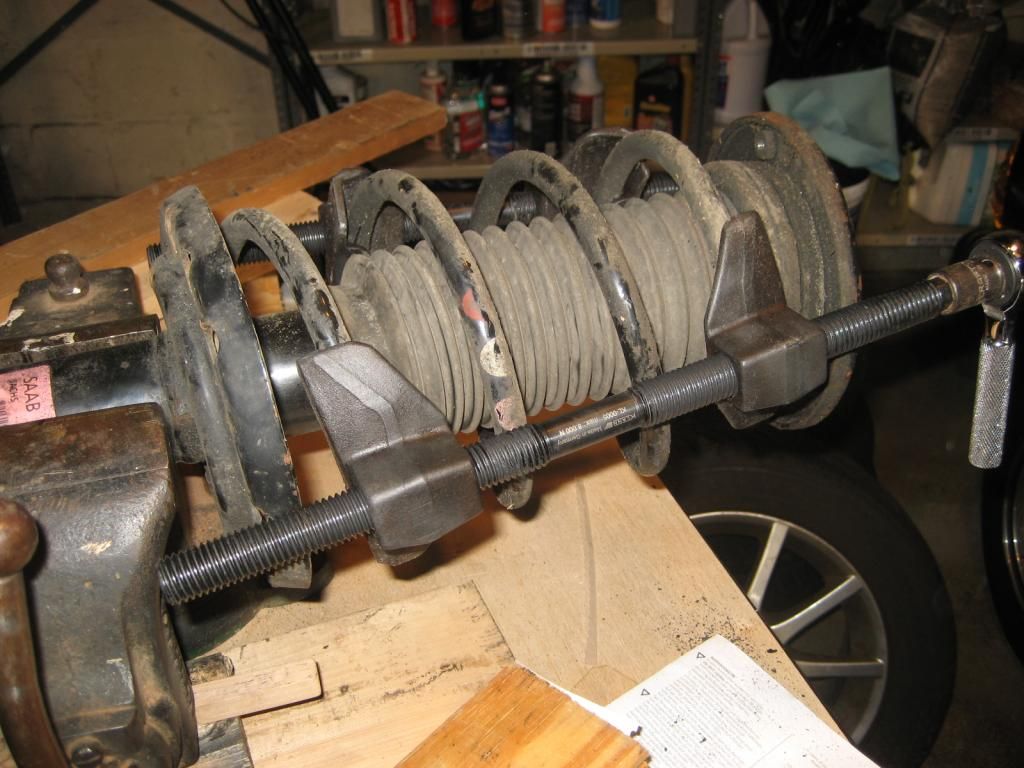
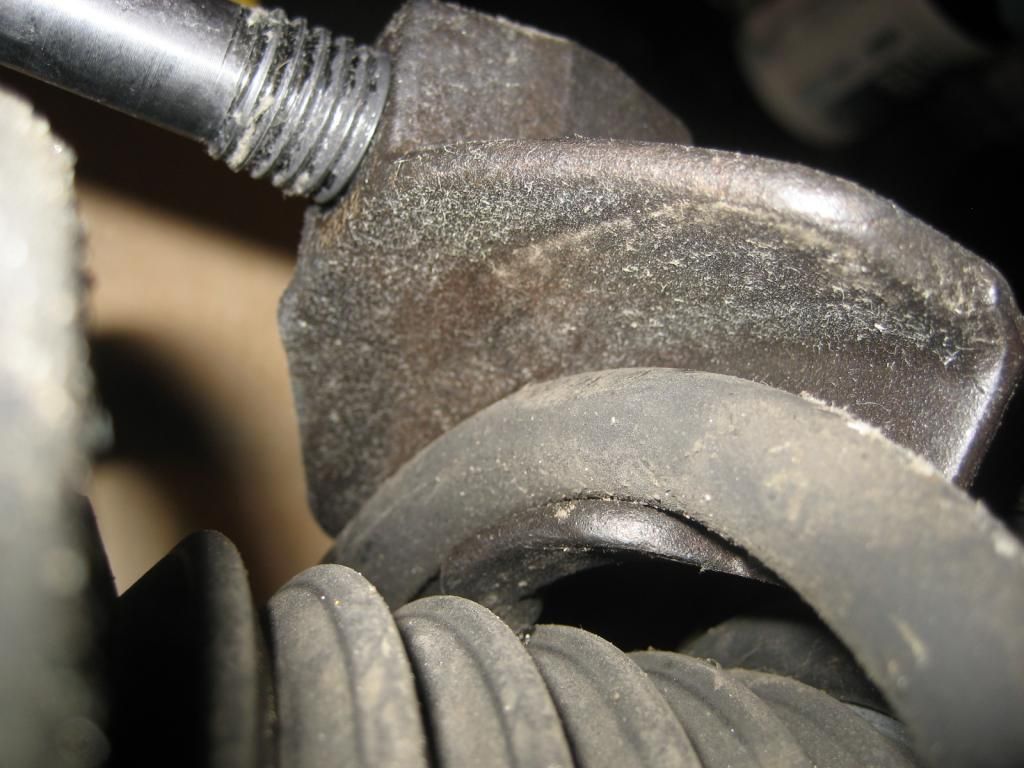
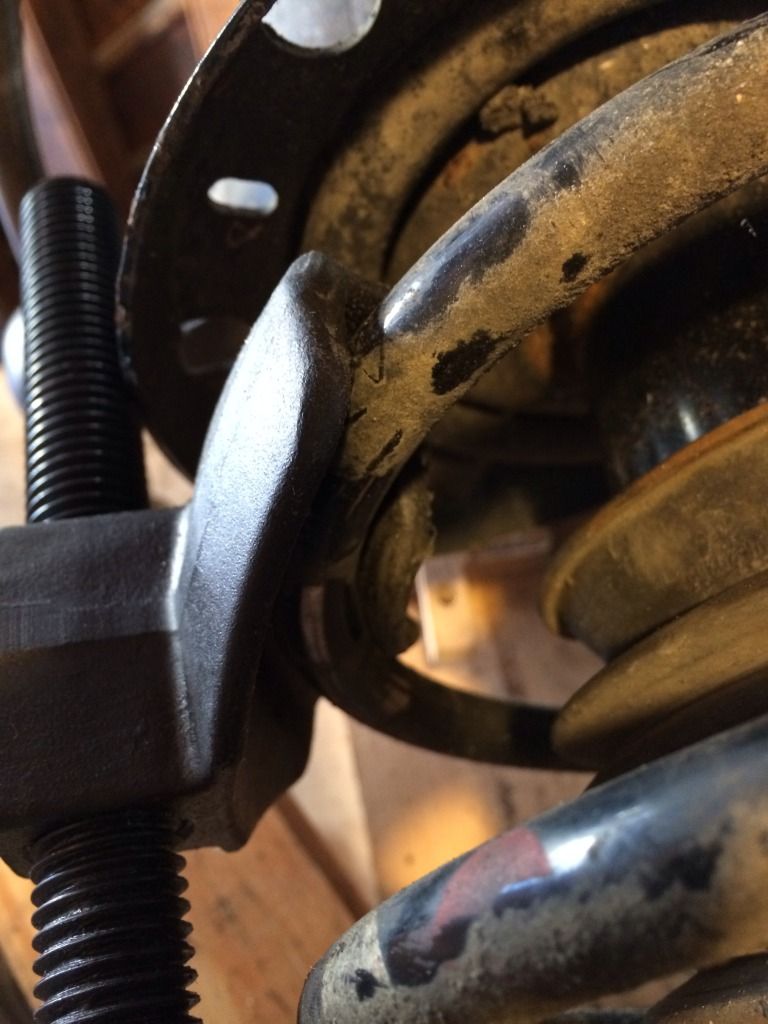
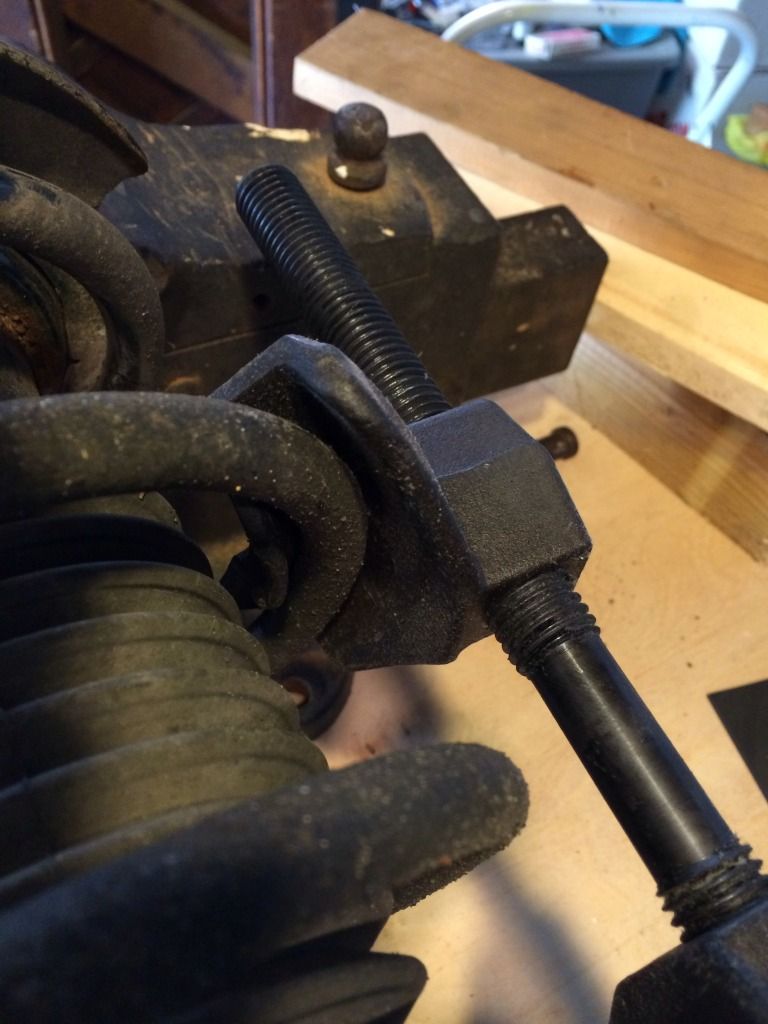
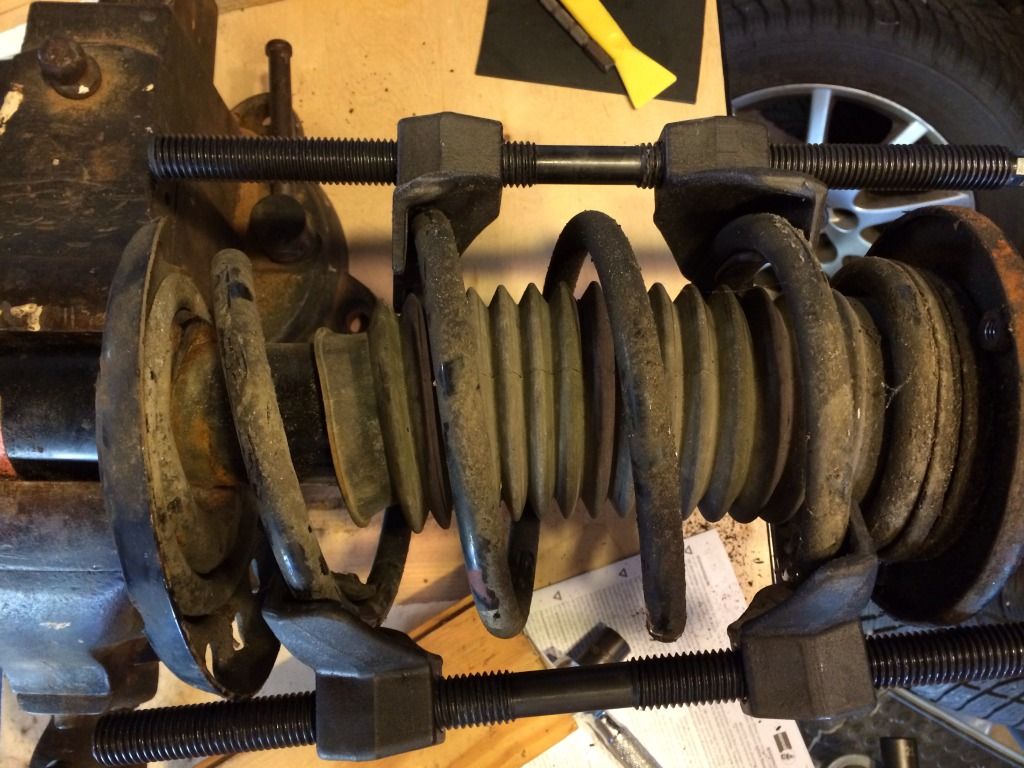
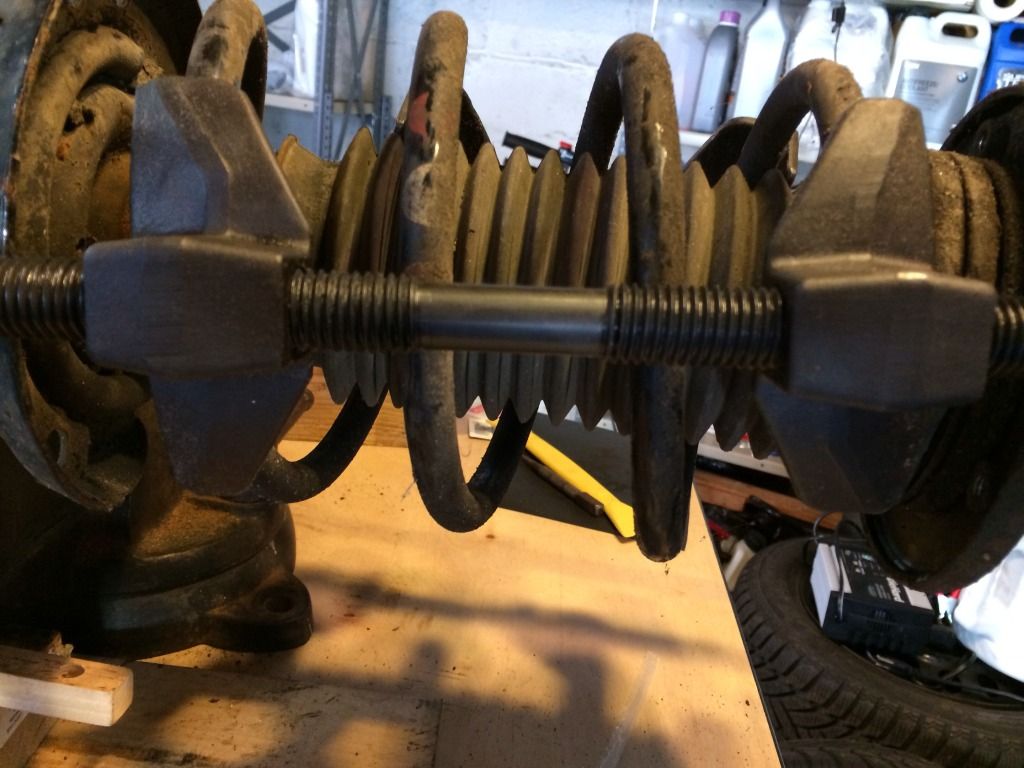
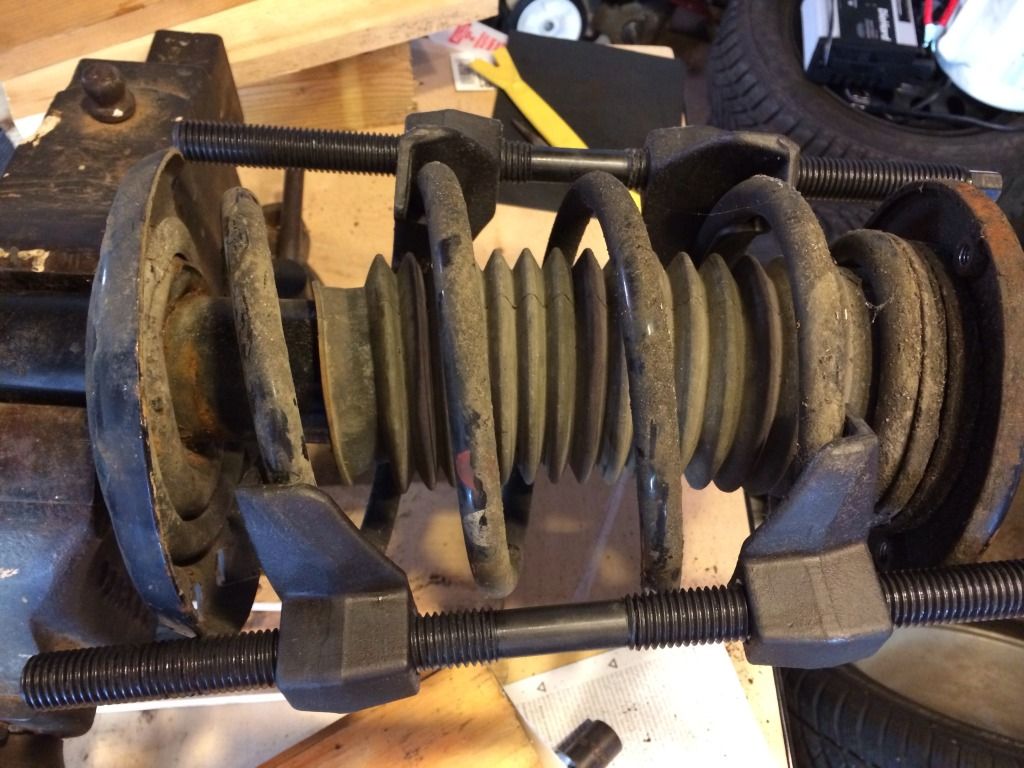
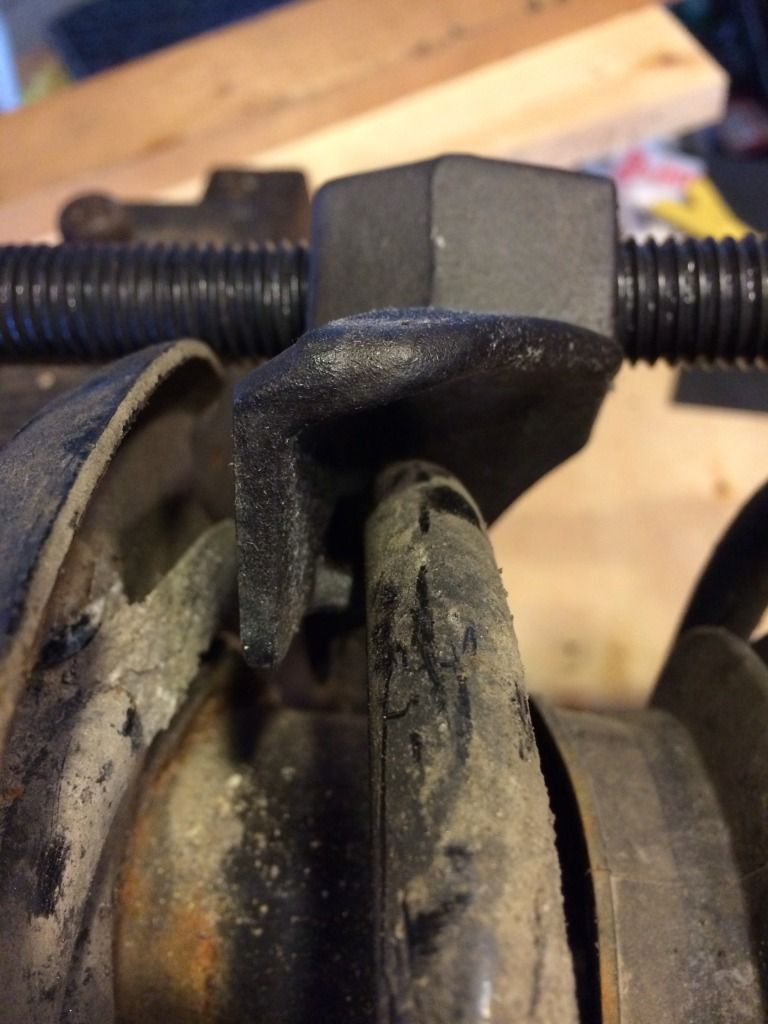
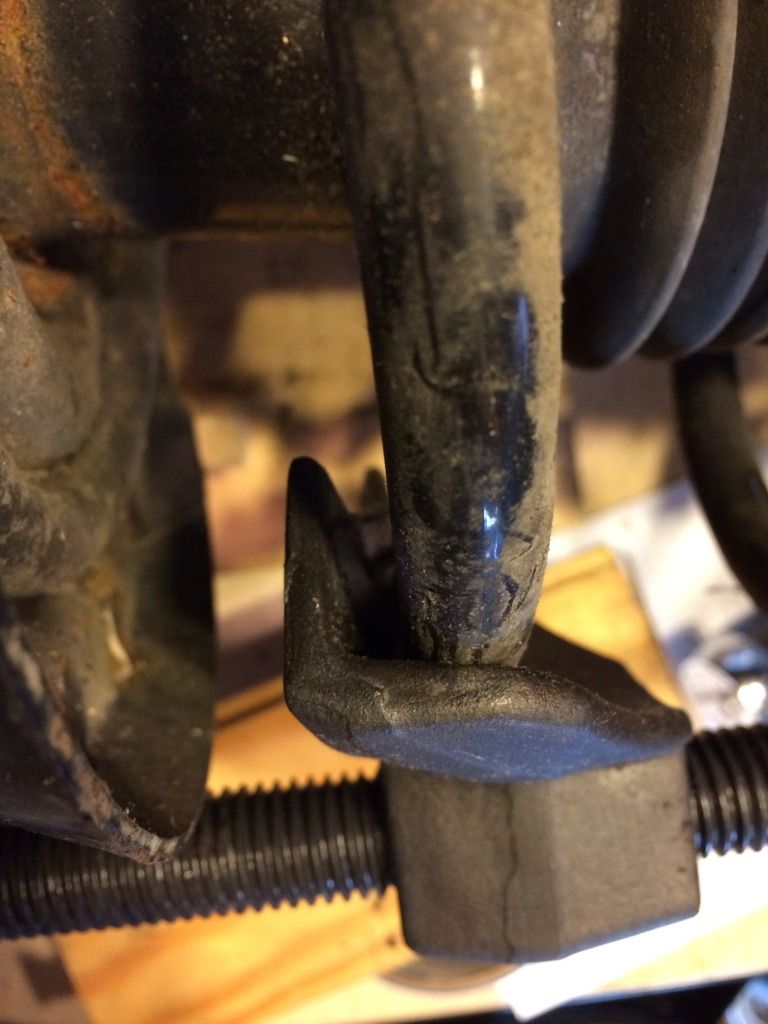
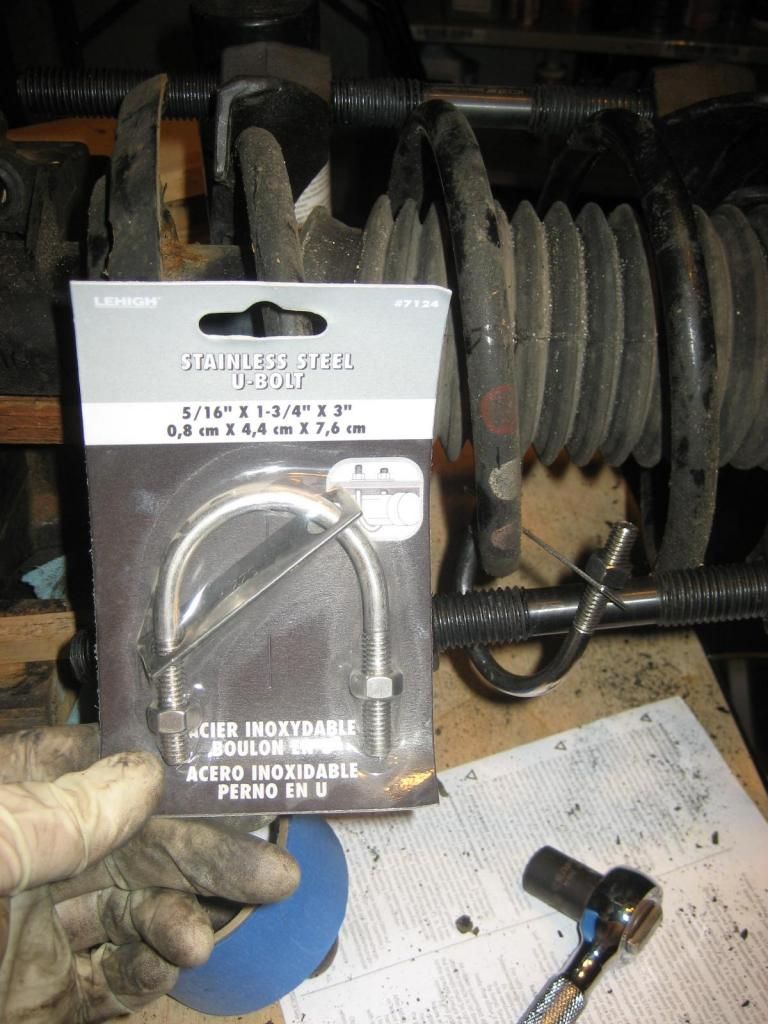
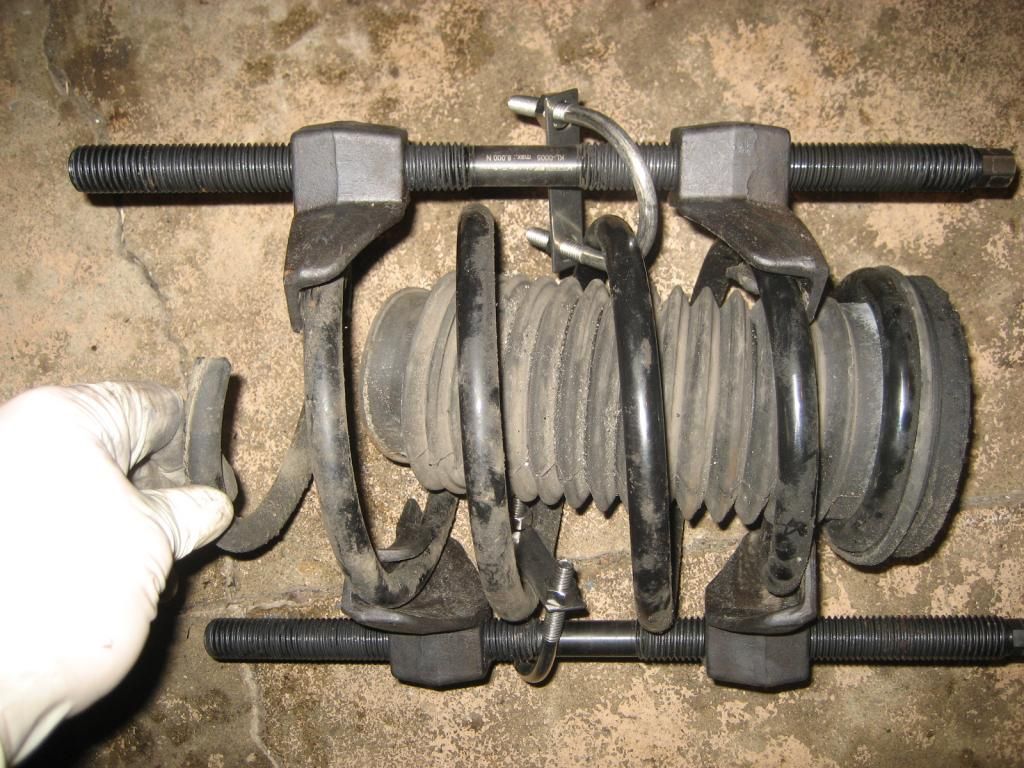
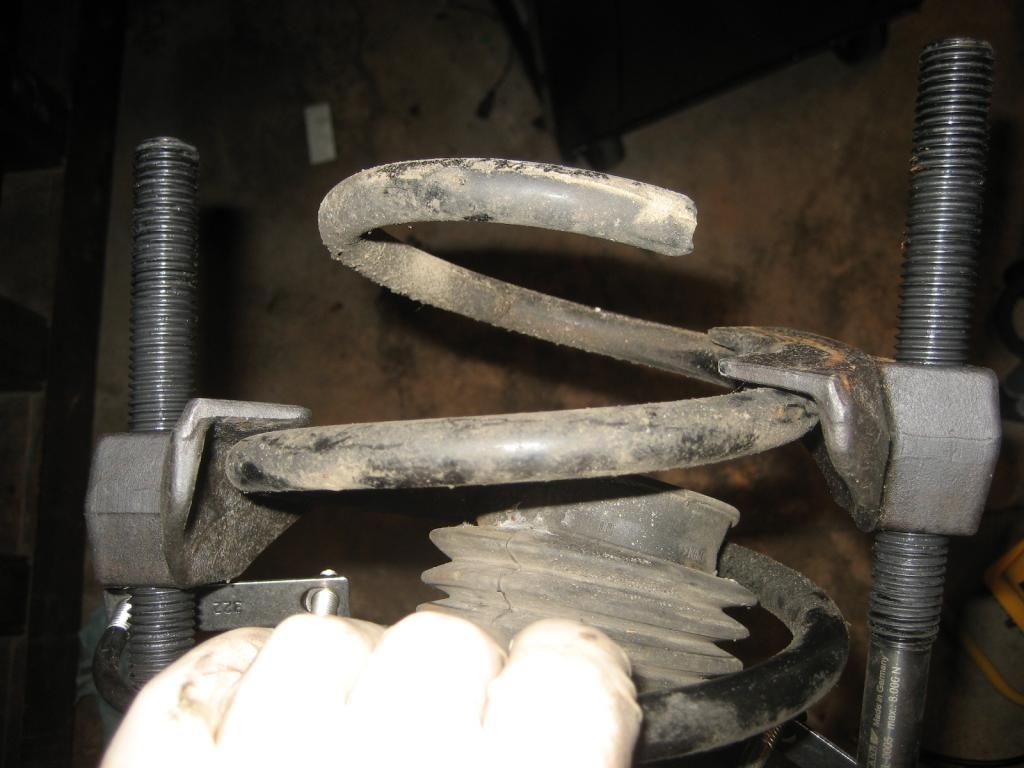
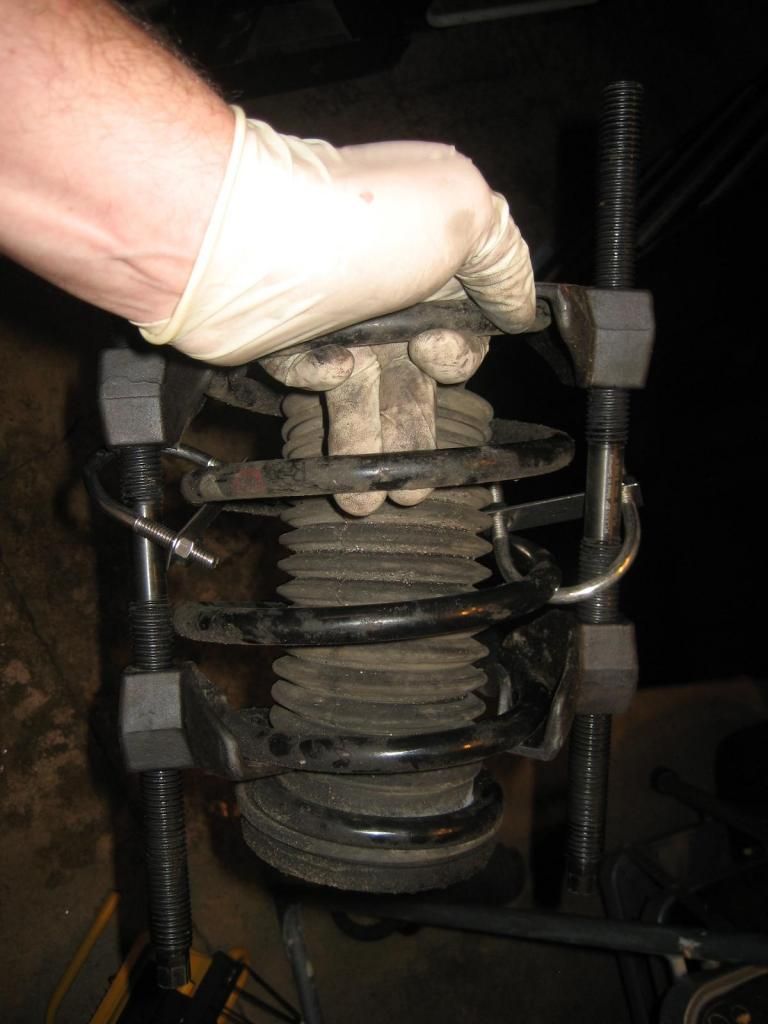
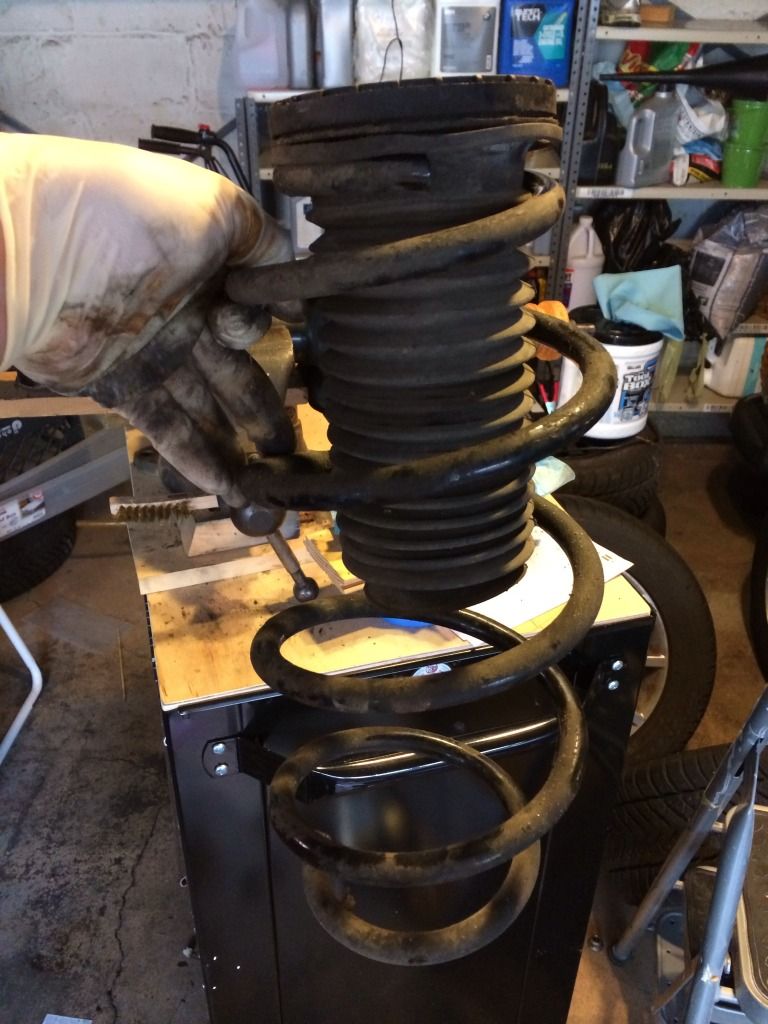
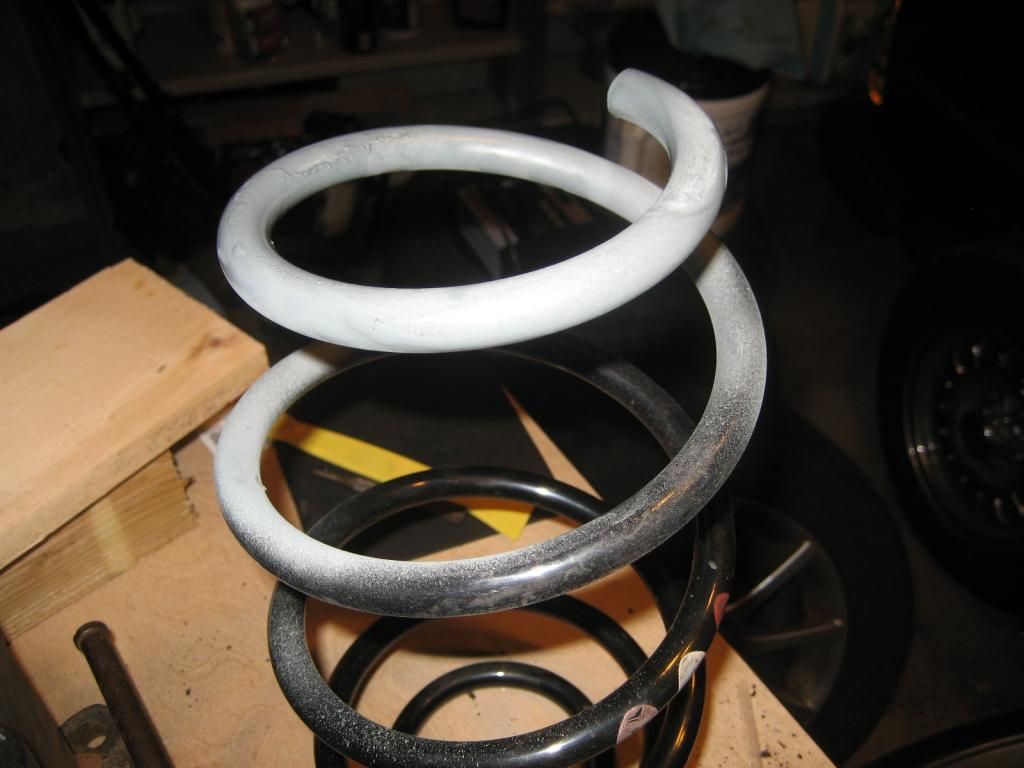
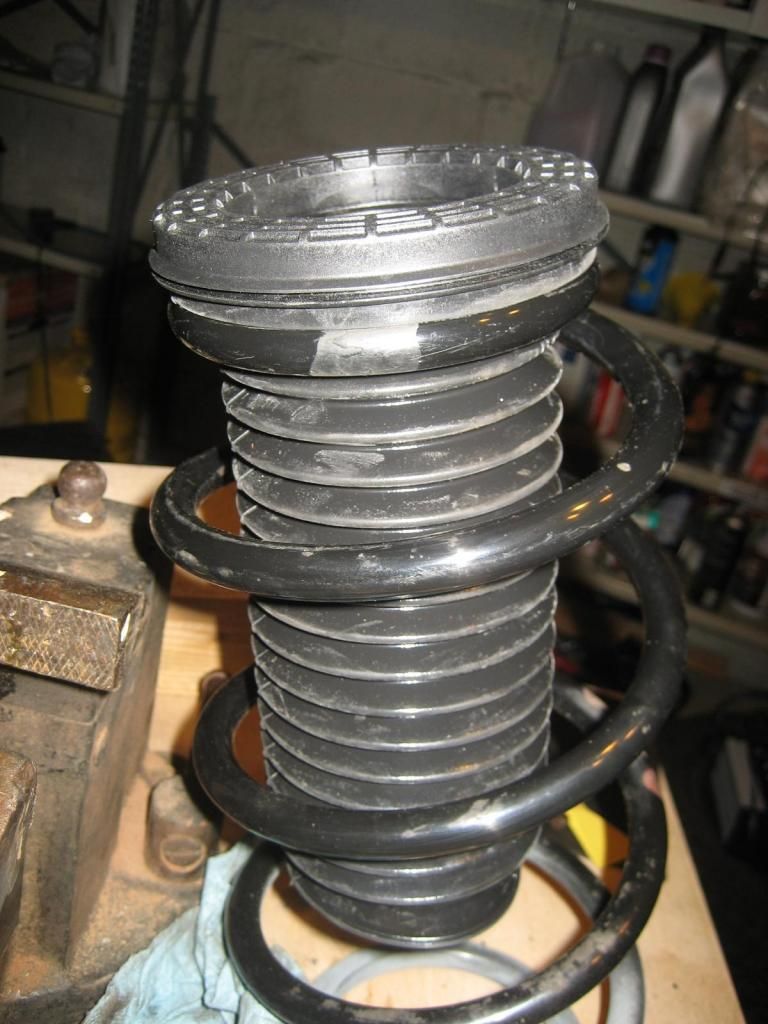
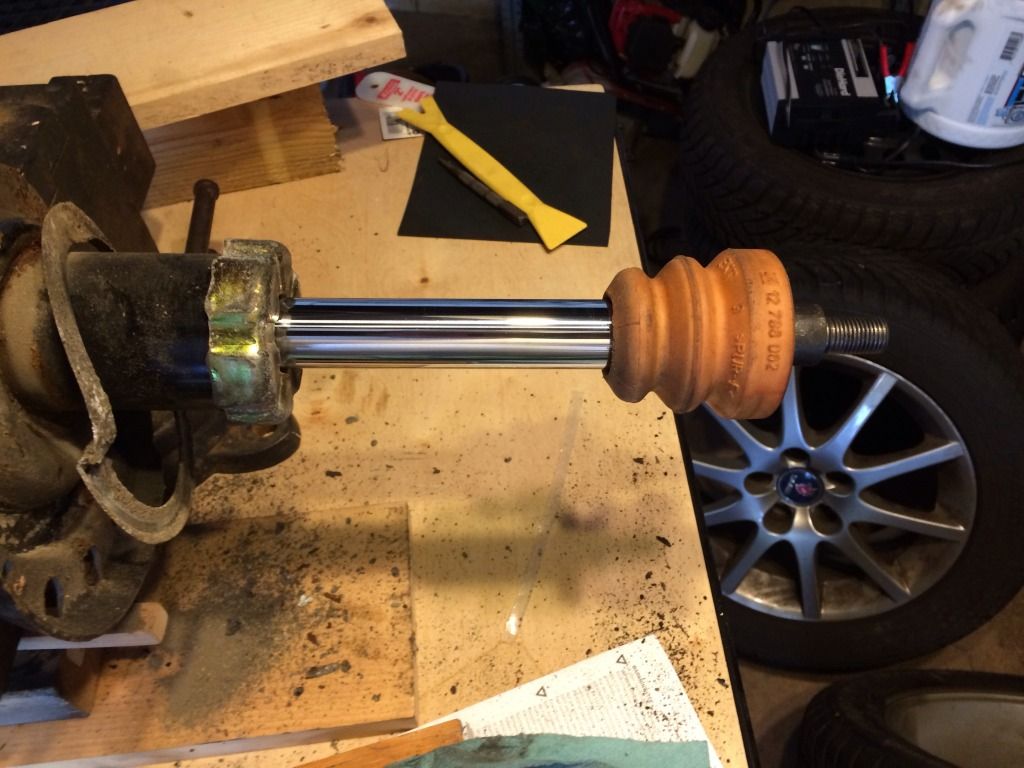
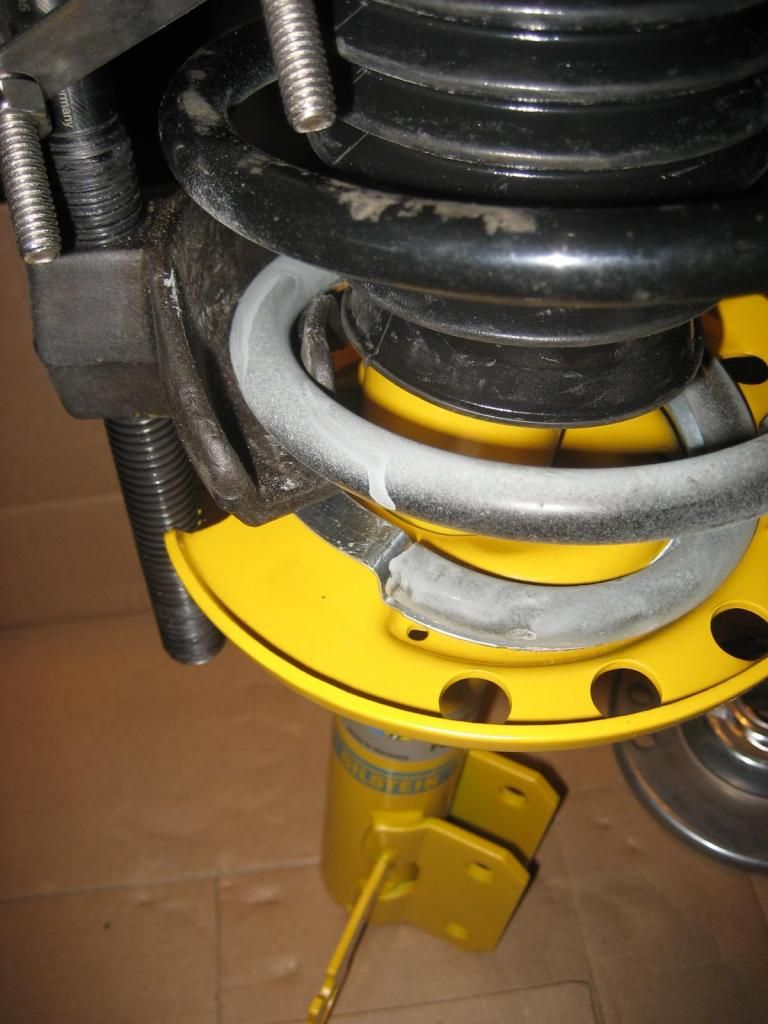
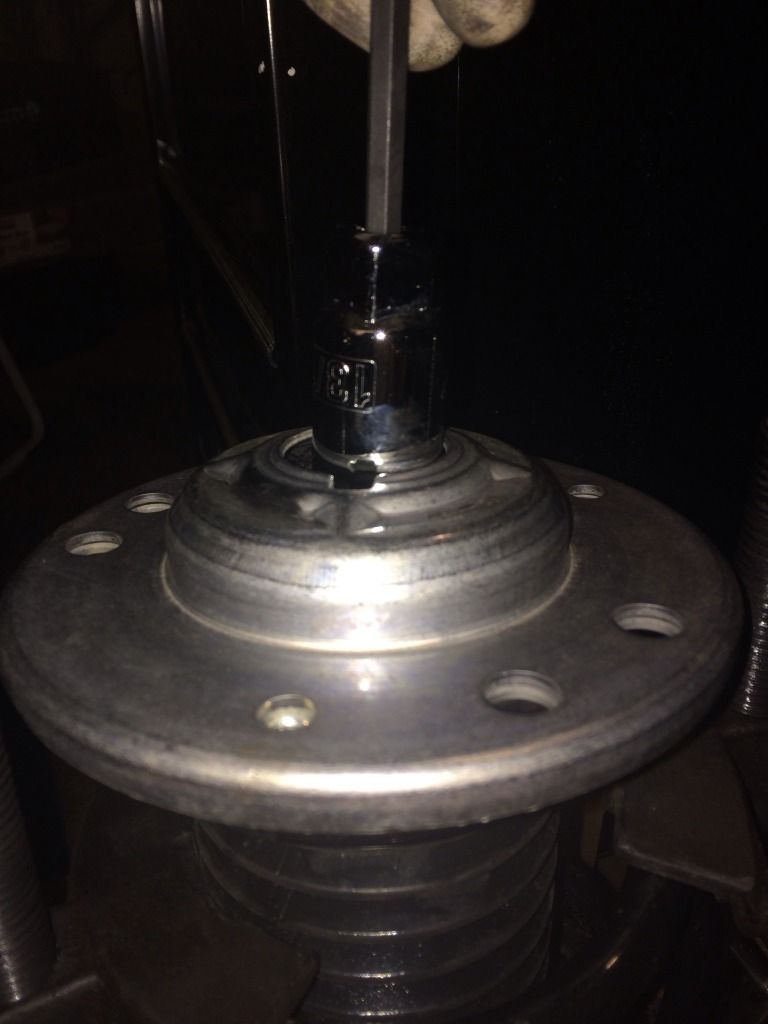
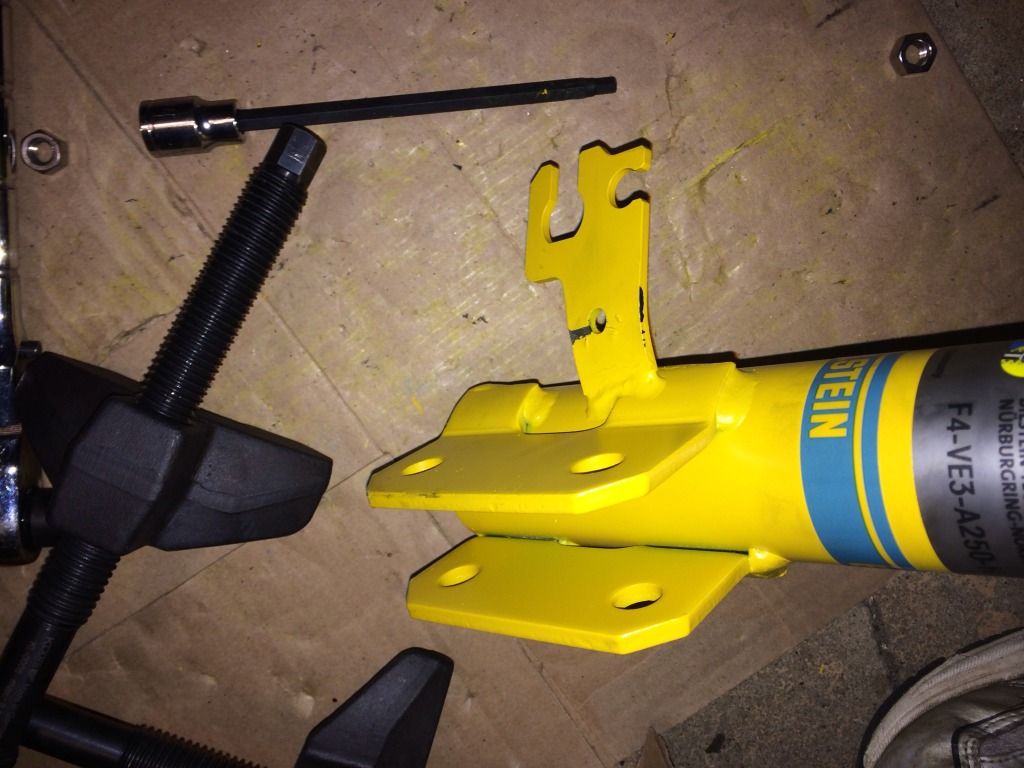
I used a combination of sockets, wrenches, a spring compressor, jack/jackstands, some wood blocks, a flat screwdriver, allen wrenches, female torx sockets, and some Boeshield T-9 and Wurth Film.

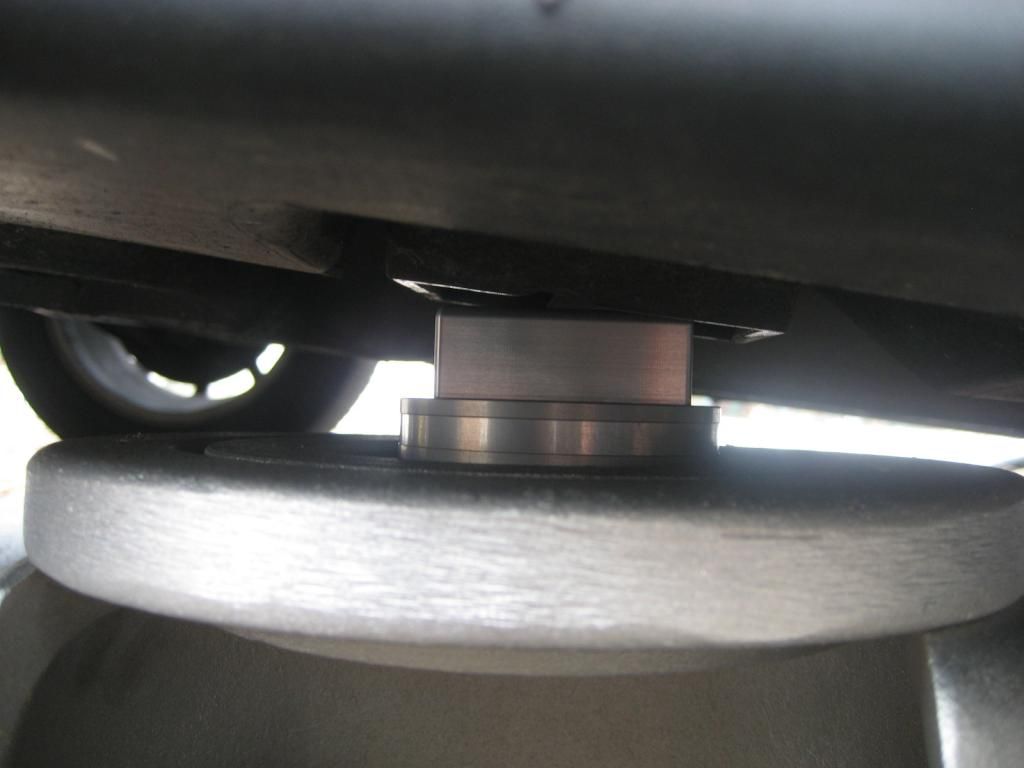
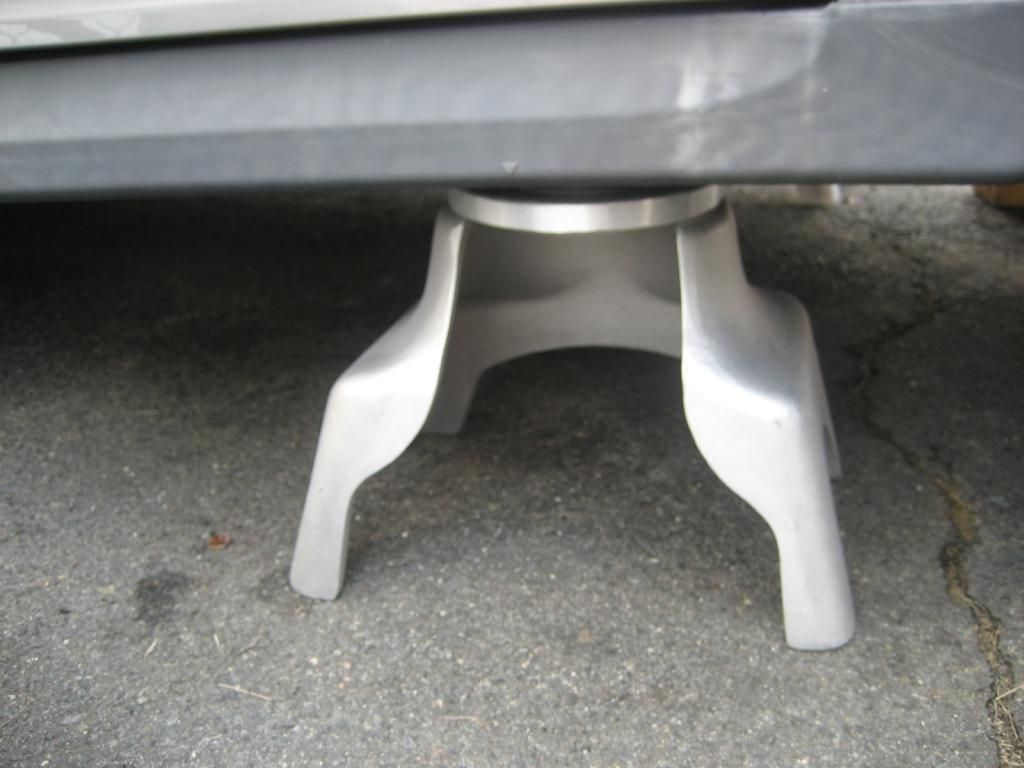
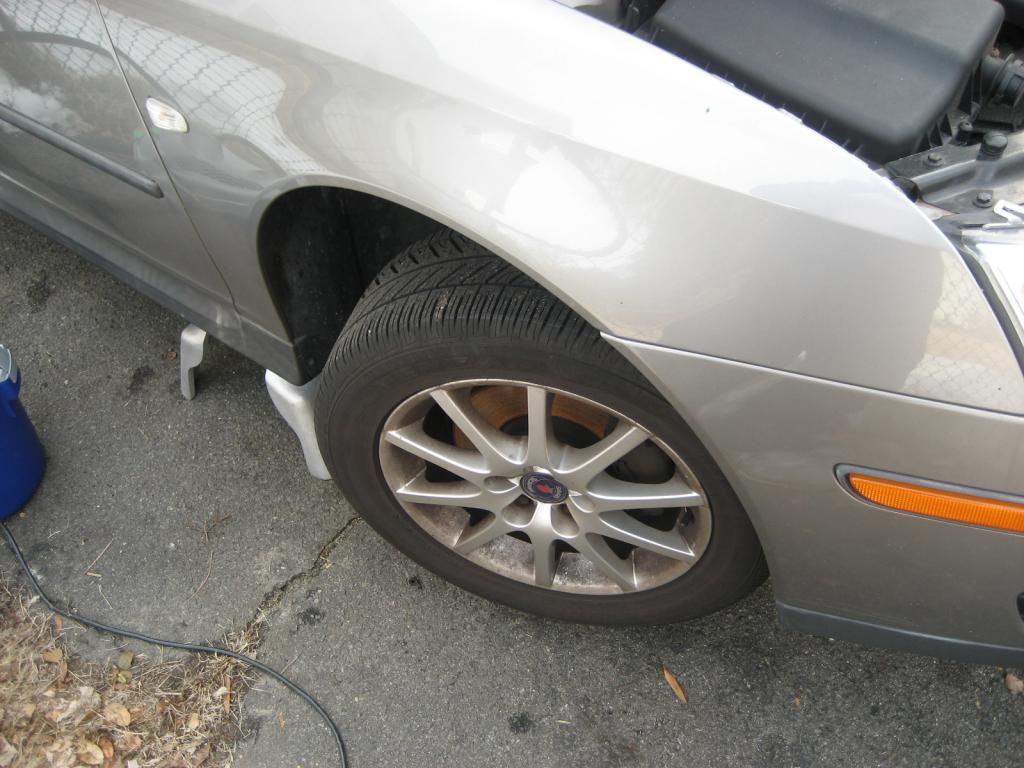
The first step is to suitably support the car. I use jack pads from Reverse Logic and JackPoint Jackstands. I did raise the whole front axle, vs just one side and then the next to get it on the stands, but these pads and stands are more stable and easier to use without causing damage.

Image


Image


Image


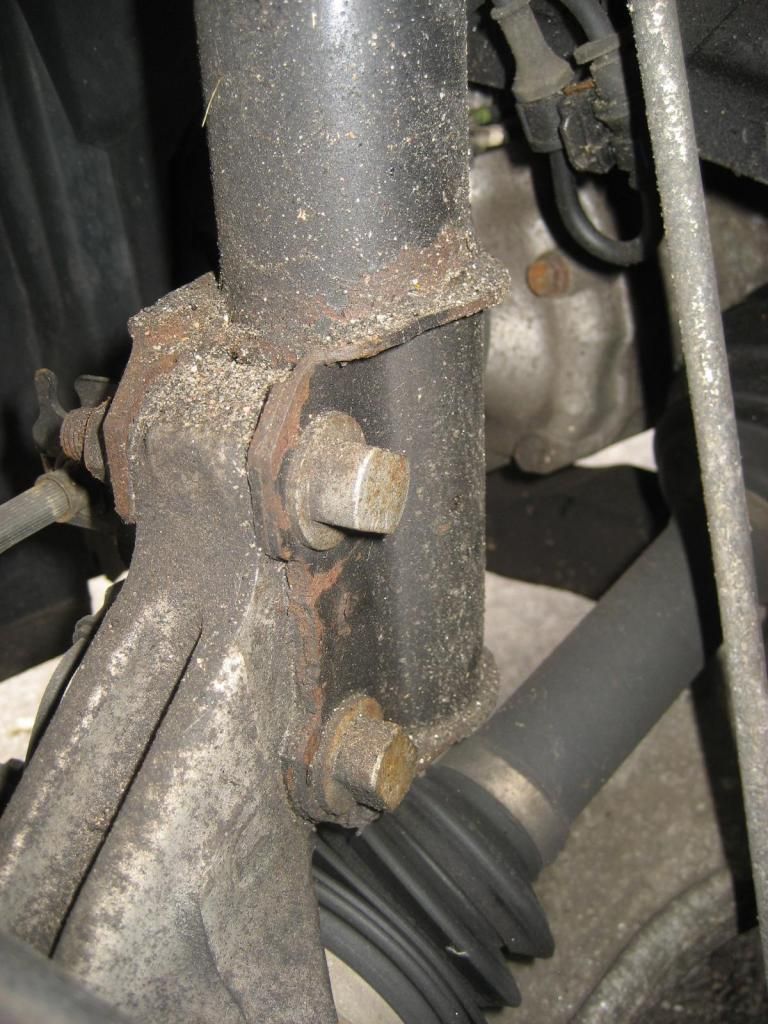
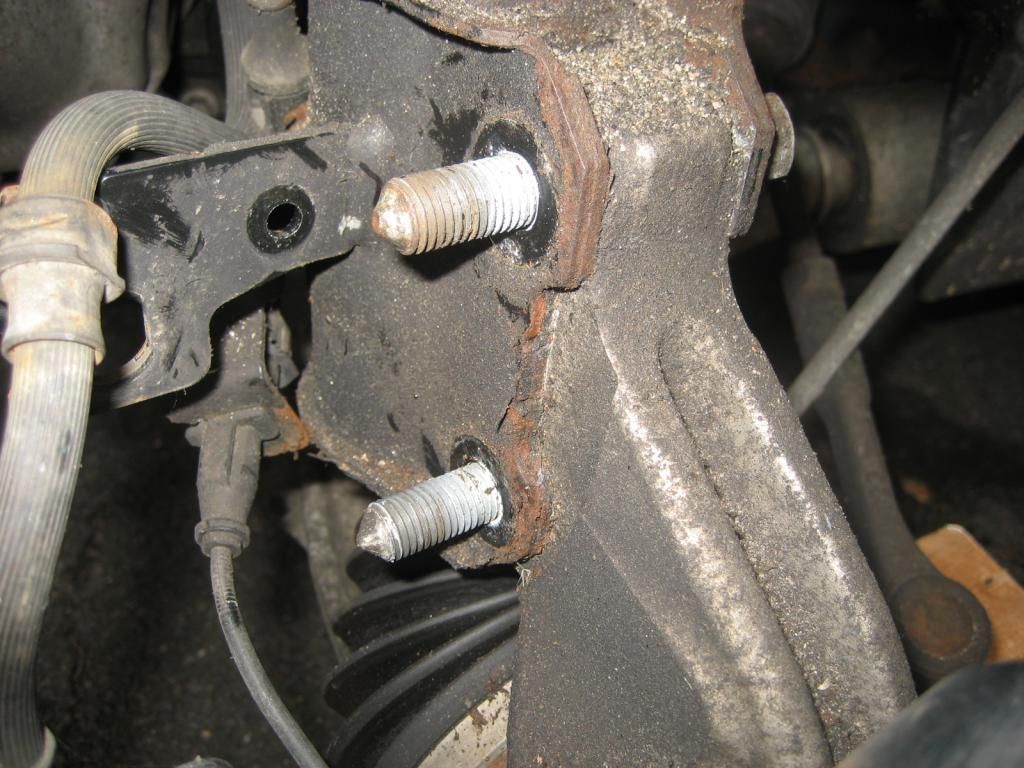
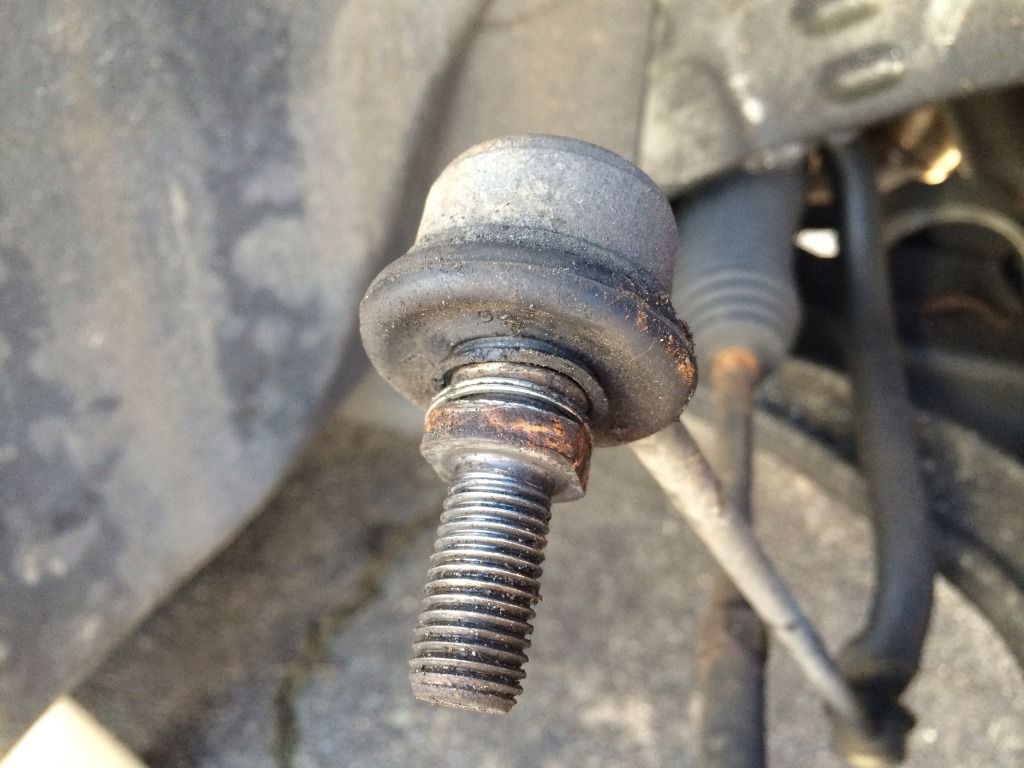
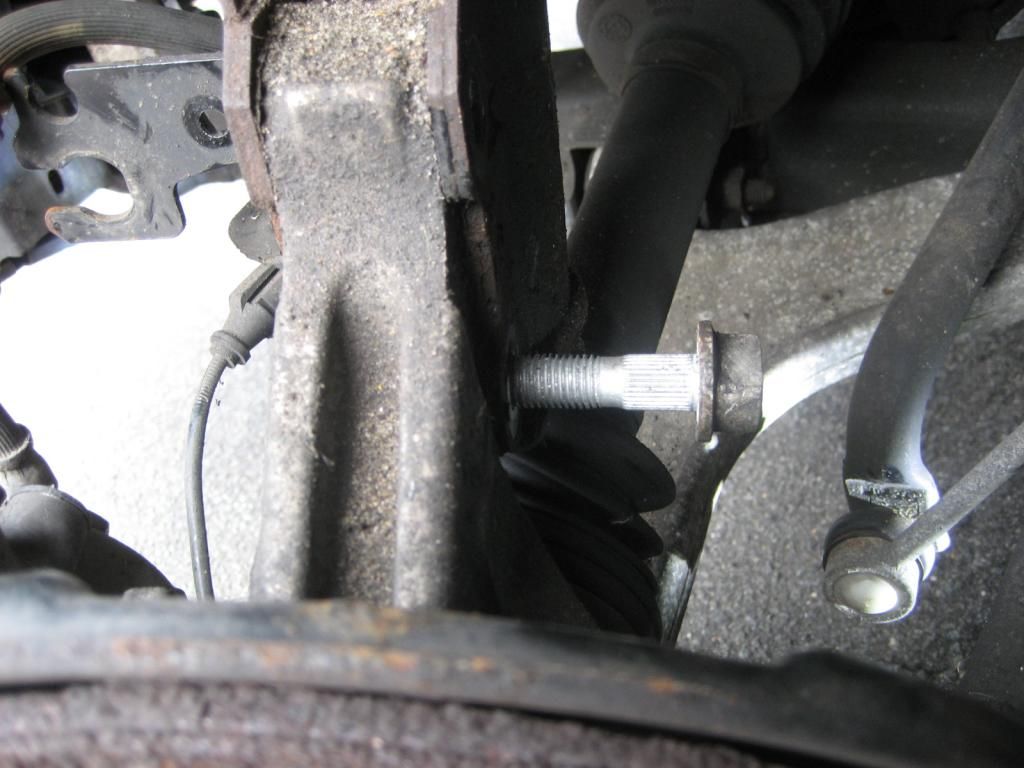
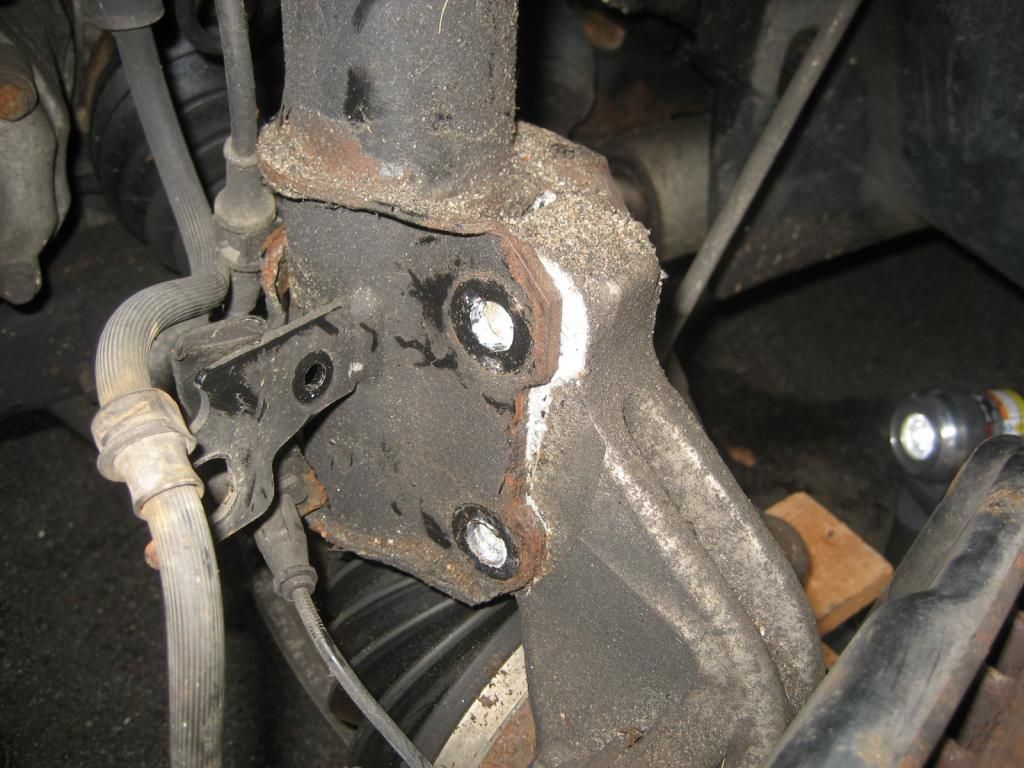
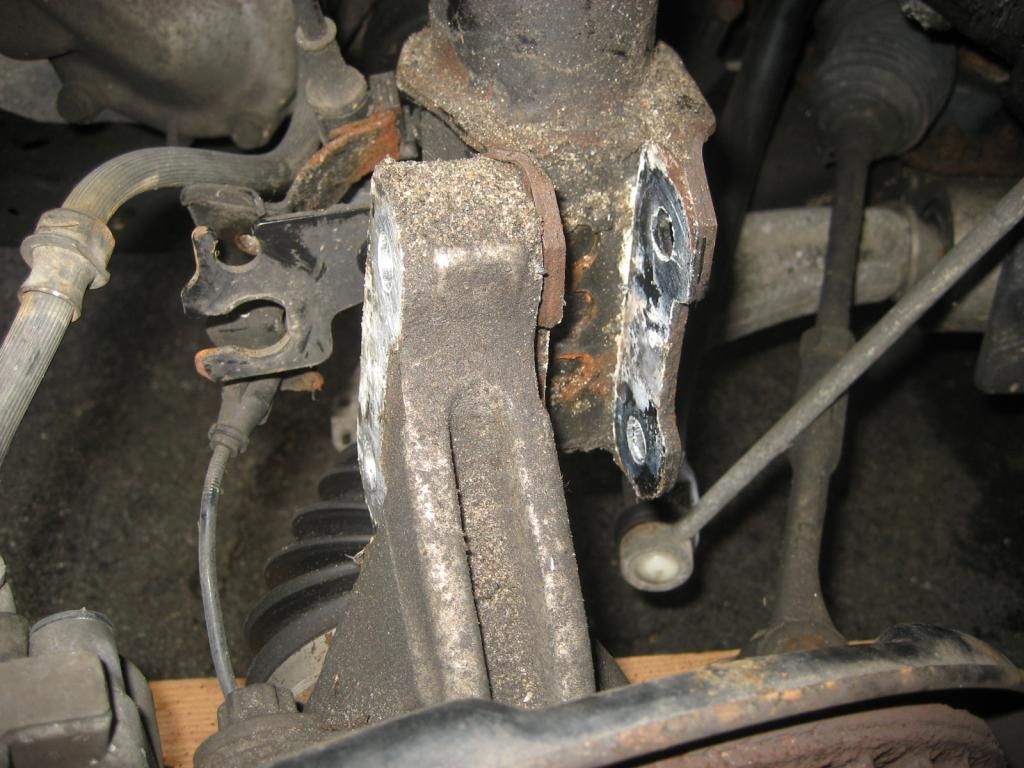
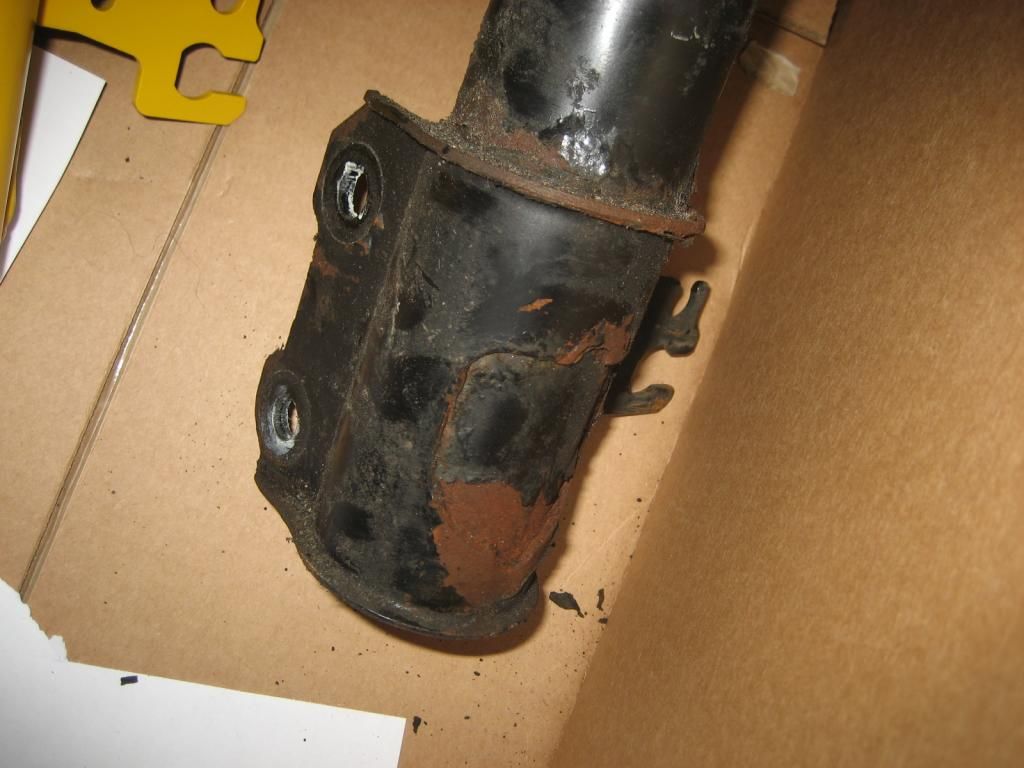
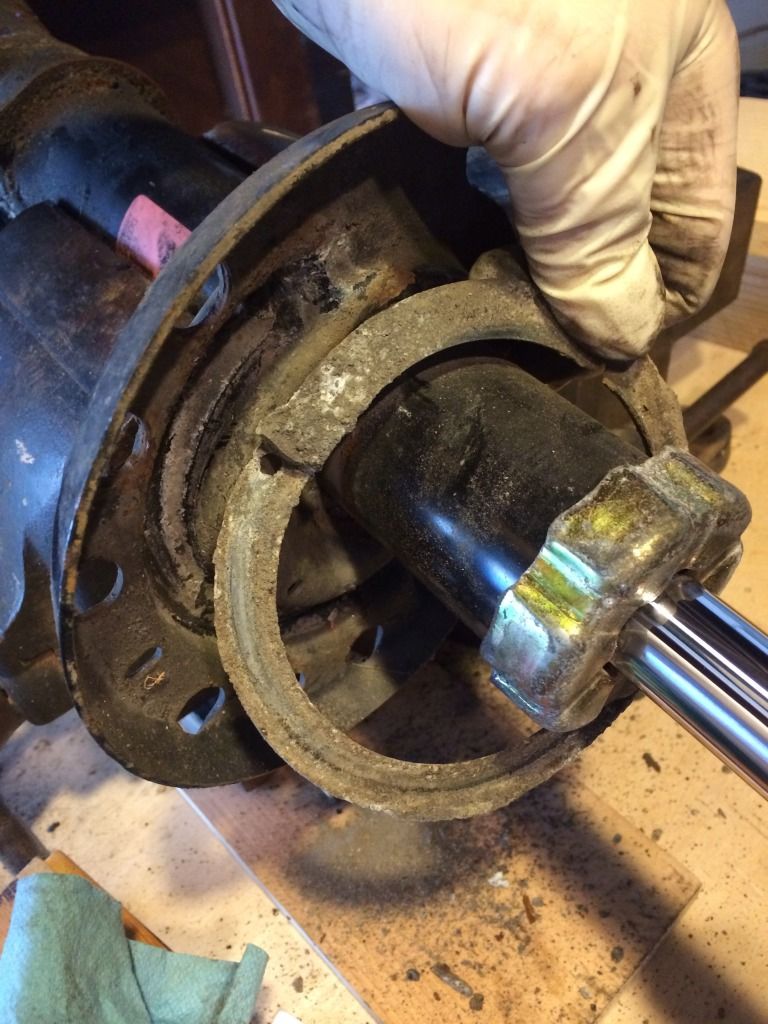
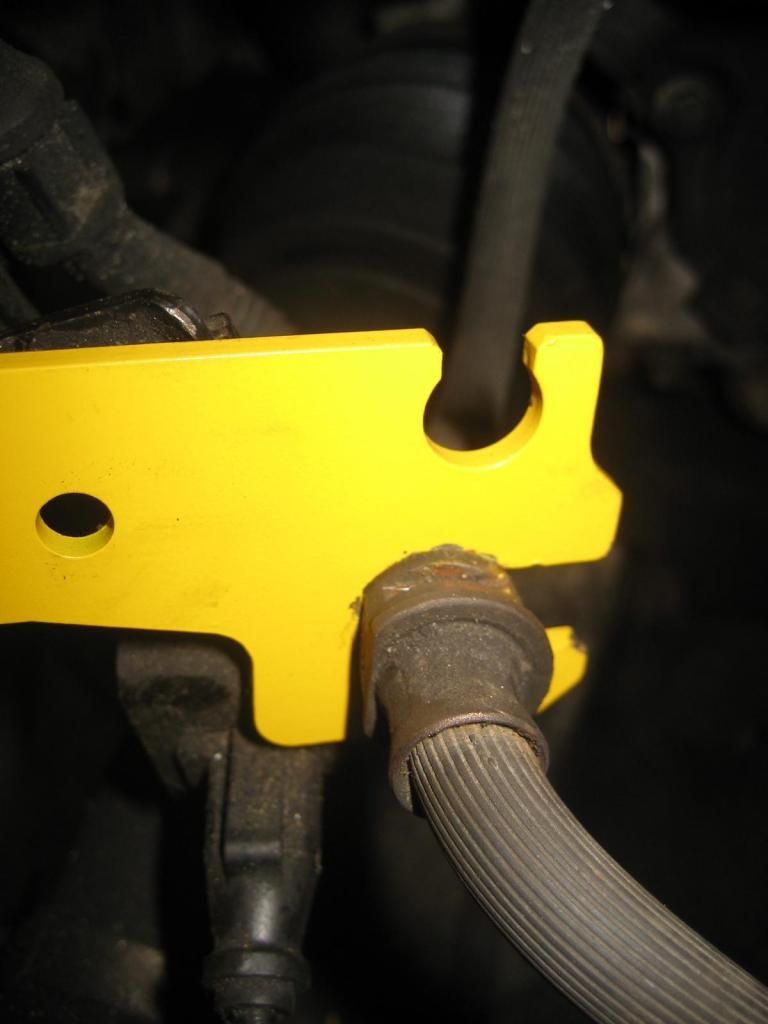
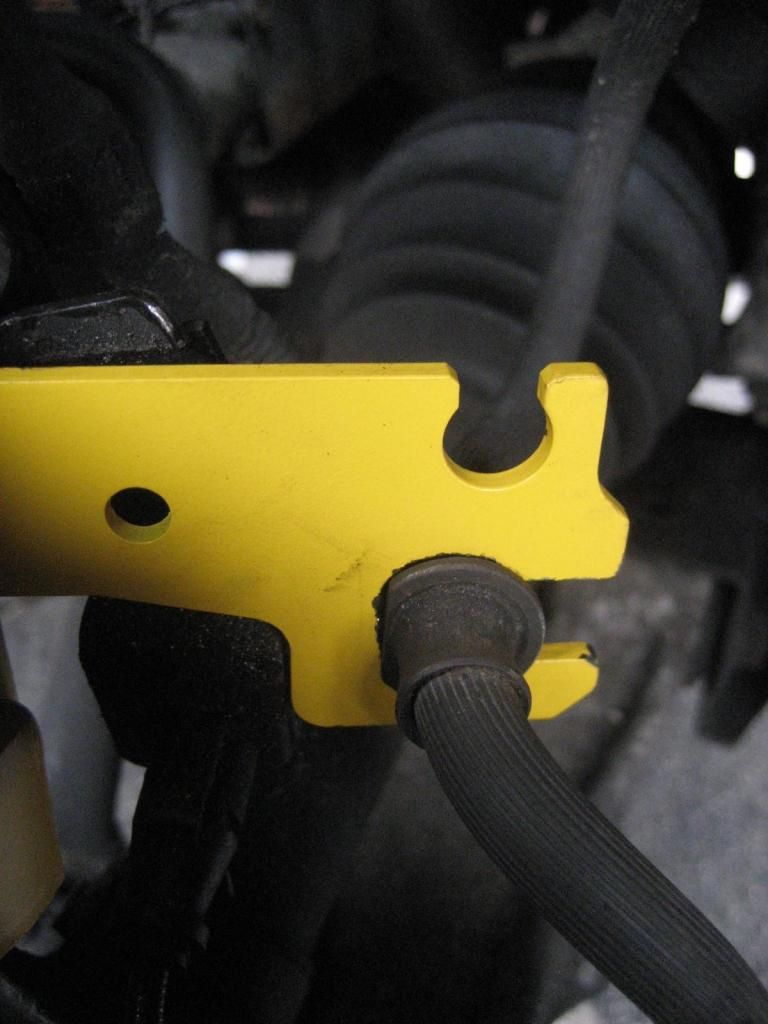
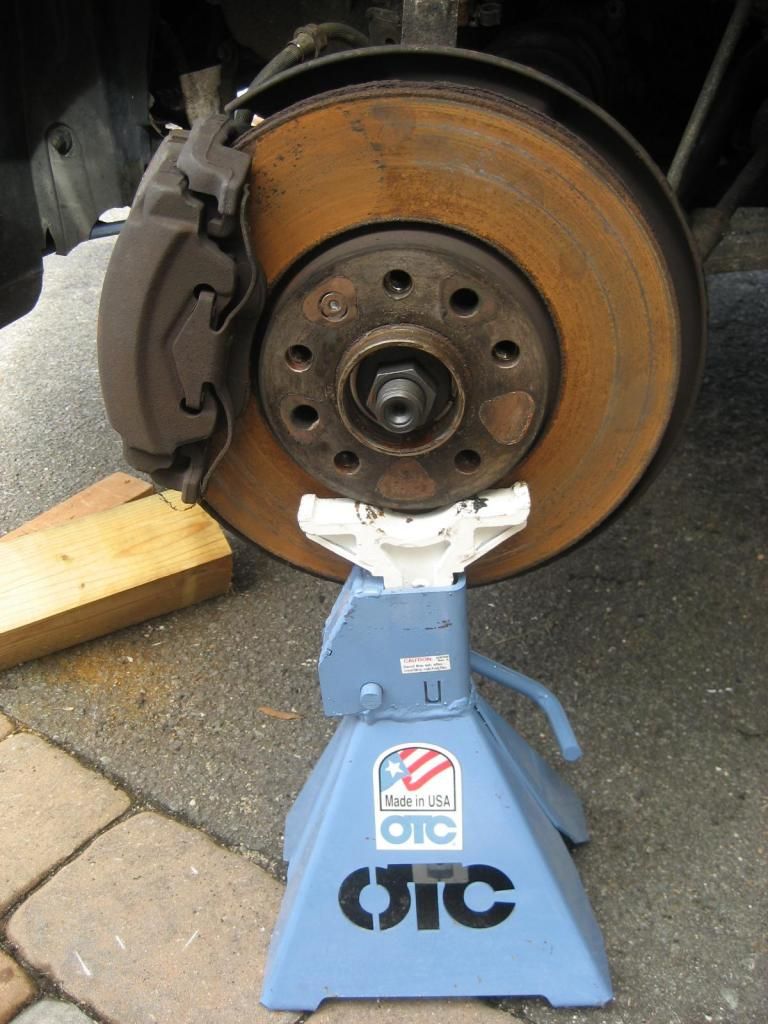
Once up, youll want to support the rotor/steering knuckle for when you remove the strut. I started with some heavy wood but then decided to use a jackstand on the axle.

Image


Image


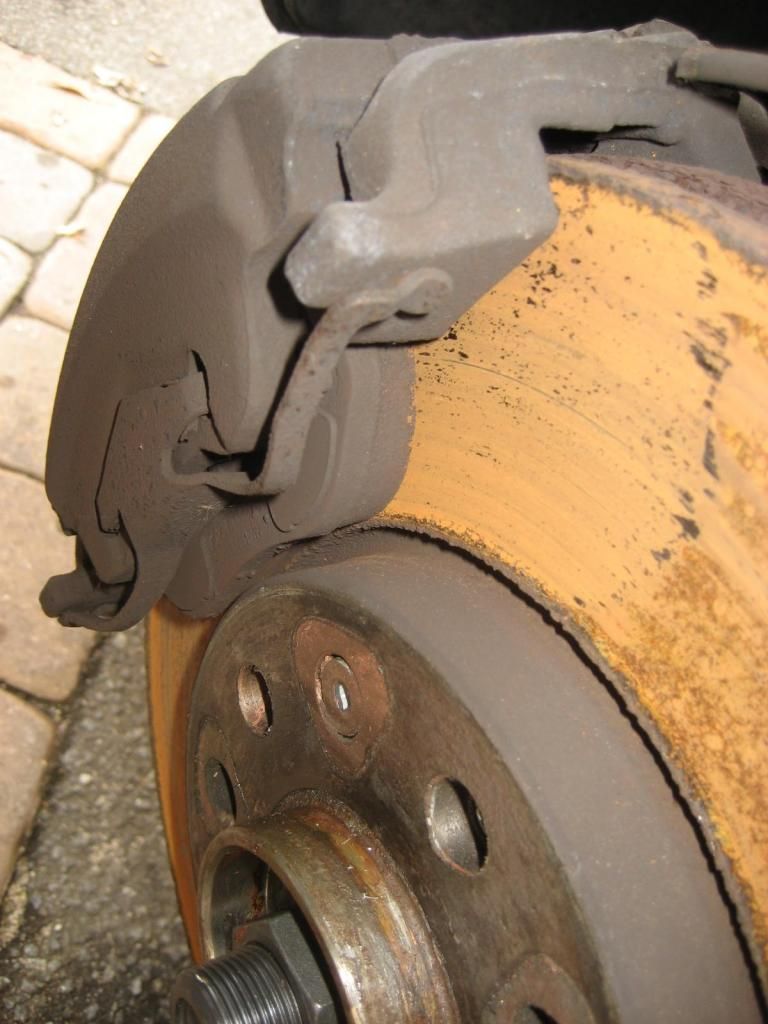
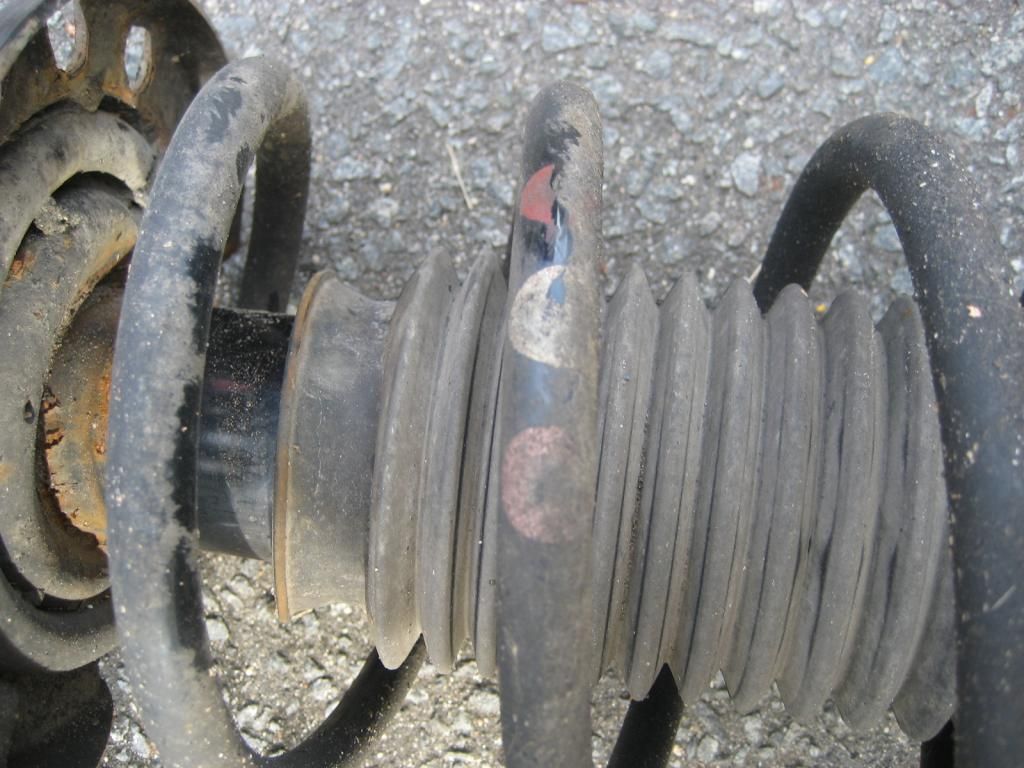
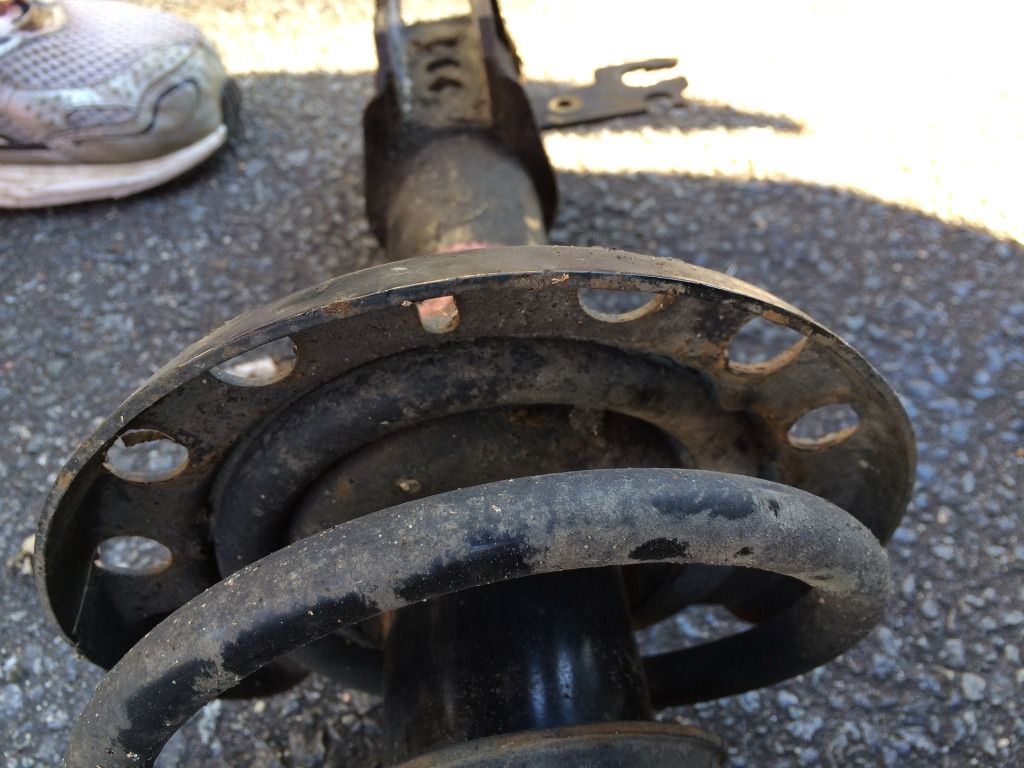
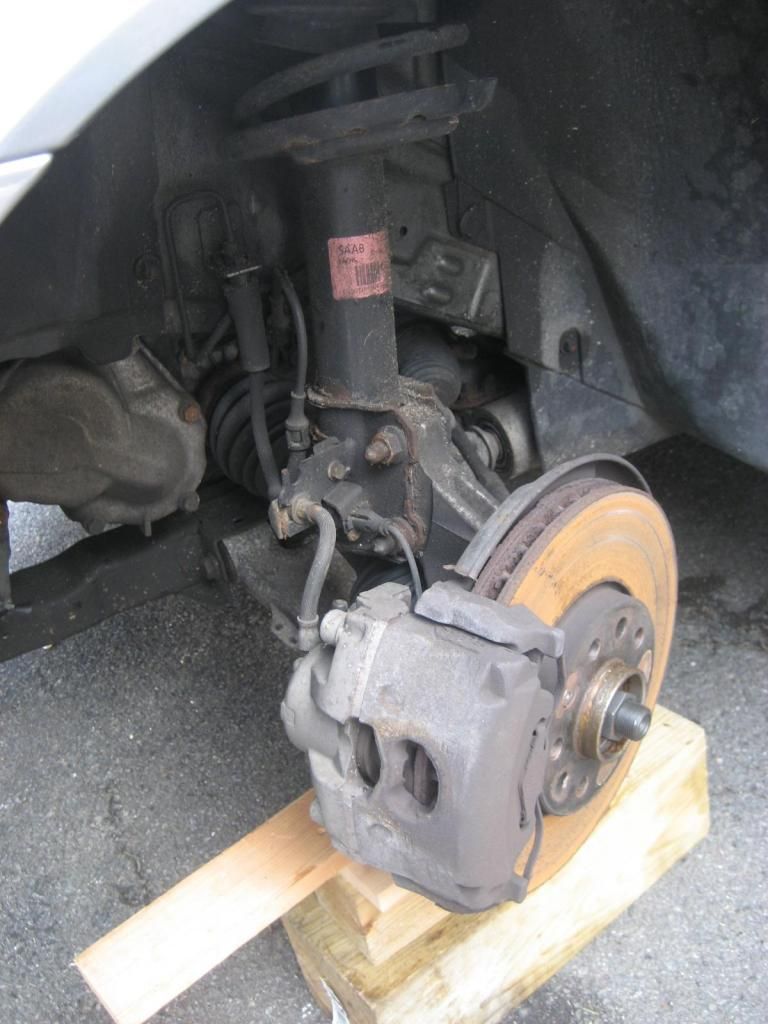
Note that my rotors have always rusted nearly instantly. These are original rotors and pads. Pretty good amount of pad left!

Image
 
#2 ·
The job starts by removing the strut from the steering knuckle. It is two hammered in bolts (they have a funny head and using an impact, I didnt have to hold the head with a wrench), and then two 18mm nuts. Youll also need to remove the brake line and ABS sensors from the bracket on the strut, and the sway bar link on the side of the strut, which uses the same 18mm nut. That sway bar link needs a wrench (17mm) that is very thin to keep the ball joint from spinning. I knocked one boot off by accident due to using a thick wrench.

Image


Image


Image


Image


Be careful!!

Image


When the steering knuckle nuts are off, then use a hammer to knock the bolts to the point where the threaded end is no longer sticking out.

Image


Image
 
#3 ·
After the items below are removed and the bolts hammered flush, go up top and remove the mount covers (if desired to put them someplace safe). Youll need a star socket to remove the bolts. I used an impact to loosen them, but the torque isnt that great so hand tools are fine, the impact just spun them out faster. I removed two and left one with just a bit of thread.

Image


Image


Image


Next, you can separate the strut from the knuckle, and then move it to a convenient spot.

Image


Image


Supporting the strut from the bottom, then remove the final bolt from up top and pull it out.

Image


The spring rate is indicated by the color marks on the springs.

Image
 
#5 ·
Image


Image


Image


Image


I used a short-handle ratchet to compress, so I limited the available torque lever-arm and could have better control. Having the compressor at diametrically opposite positions is important.

For added safety, I added some u-bolts just to help hold the spring to the compressor. Eastwood sells a fancier version of this, but I got these for around $5 at HD.

Image


Image
 
#6 ·
So compress it, and then you can remove the mount. Because I was changing the struts themselves, not just the bearings, I used an impact. If I was keeping the strut (and of course for tightening), an impact shouldnt be used because you dont want to turn the shaft.

After hitting it with the impact, the nut will come off and then you can pull the spring.

Image


Image


Image


Then the compressor can be released slowly and evenly if desired. I decided to because the spring had some abrasions in the coating, and I wanted to clean them up.

Image


Image


I cleaned the spring up and then used CRC cold Zinc galvanizing spray to coat the exposed area.

Image


Image
 
#7 ·
I chose Febi Bilstein mounts and bearings. The Febi mount is probably relabeled OEM Saab/Sachs/Boge because all markings were scratched off it. The Febi bearings, like the original ones on the car, are made by INA.

Image


Image


Image


Image


Image


Once reasonably clean, you can install the bearing into the bellows, and install onto the spring.

Image


Image


If the old spring wasn’t decompressed, the job is easy to do, if it was decompressed and cleaned, then it will need to be compressed again, so ensure you know where the compressor should sit.
 
#8 ·
Here are a few shots of the bilsteins vs the OE Sachs struts. Note that the Bilstein has a far thicker shaft and does not use the OE bump stop. The OE ones could be compressed VERY easily, and were quite slow to return to full extension. The car still rode beautifully, and handled well enough. As mentioned above, the car did crunch over speed bumps in the cold, and I guess the noise was actually the strut, as it hasn’t happened since!

Image


Image


Image


Image


Image


Image


Image


Image


Image
 
#9 · (Edited)
The struts use a zinc washer under the spring, at the perch. Some parts sites show that a rubber hose protector is to be used, but my trusted Saab parts expert stated that these caused corrosion on the springs, so the zinc was added as a sacrificial item.

Image


Image


Image


Image


Image


Note that two different types of locknuts are used. Saab uses an out of round bolt, while Bilstein uses a Nylok. I like the Saab hardware better personally.

Image


Now, the spring can be put back on and then the bearing/bellows interfaced to the mount, and the mount then torqued down.

Image


Image
 
#10 ·
Put the socket on it, hold the shaft with a 6mm hex, and tighten.

Image


It can be exceptionally tough to get the zinc to line up, and keep the spring at the right point on the perch. The issue is that the zinc will move/bend/extrude.

Image


The bearing spins free via the mount, very nice. But everything is crooked. As the mount is torqued down it will straighten out and be fine. I used a 13/16” spark plug socket, tightened with a crows foot wrench so that I could hold the hex in the strut with a long allen.

Image


Image


Image
 
#11 ·
Be careful with manhandling the strut to move the spring into the correct spot. In trying to perfect the zinc’s placement, I bent the metal bracket. Im fairly strong and in shape, but this was a thick piece of metal - but its easy to exert… Also be careful with the compressor, as the threads can scratch the paint on the strut. I ended up touching them up where the paint was removed, and then sealing up with Boeshield T9.

Image


Image


Image


Image
 
#12 ·
Installation is the reverse of installation. The main steering knuckle bolts and all locknuts must be replaced. The old knuckle bolts had some white substance on them, I assume to prevent seizure. I added a little anti seize to the base, but not the end, so that the torque setting would not be effected. Torque the main bolts to 59 ft-lb + 135 degrees of rotation. The sway bar link gets 47 ft-lb.

Image


Image


One issue I encountered with the Bilsteins is that I couldn’t get the metal ring on the brake line to fit the bracket on the strut. I had to file it out and then it fit fine…

Image


Image


Image


Sprayed down with some anti-rust protectant (used Boeshield but ran out so then used Wurth Film), and almost there!

Image


Once the car is back down on the ground, do the final torque for the strut nuts (78 ft-lb), and torque the star bolts holding the mount to the body (14 ft-lb).

Done!

Rear shocks are super easy. Pull the mount and the bottom bolt, then attach the shock to a new mount (or reuse), torque the top nut to 24 ft-lb, then install the mount, align the bottom holes, tighten up. The mount can be torqued with the wheel in the air because it is a metal-to-metal connection, however the bottom bolt is metal to rubber and must be torqued with the car on the ground. The mounts get torqued to the body with 39 ft-lb and the shock to axle carrier gets 111 ft-lb.
 
#14 ·
Great write up and pics.

As far as I know the zinc spacer shim at the bottom of the spring was superseded by the plastic hose type part. In the EPC that is what it shows anyway. The shims are available to some degree and it probably does not hurt anything to have it in there.

The Bilsteins are a mono tube design and the Sachs are a twin tube design hence the difference in the shaft diameter.

I'll have to look at my WIS and see if it shows anything about the zinc shim.
 
#19 · (Edited)
Well consider me schooled

So I did some digging around in my copies of the EPC and WIS about the rubber hose VS the zinc shim. It took me a bit as the EPC shows the zinc shim in the diagram but no part number is shown. In the WIS they show the rubber hose as well under the "normal" instructions for the springs and struts with no mention of the zinc shim.

But

If you dig around there is a button in the window of some WIS pages (second from the right) that looks like a piece of paper with an exclamation point on it.
When you click that when in the front suspension section of the WIS you will find bulletin # 731-2726 which I will post a link to below. In that bulletin it is very clear that the zinc shim is indeed the correct part to use (in the affected states at least) and the rubber hose should not be used at all.

I for one am astounded and humbled at the same time that this is not widely known. I have said for some time that the rubber hose is the newer part and I have been wrong all this time. My apologies to anyone who listened to me on this in previous posts. I was basically repeating what I had read in other posts without doing research beyond on the web. Anyway I find it strange that the EPC does not really call this out properly as well. I think that this is important enough that it should get put into the DIY section about struts and springs so the correct information is readily seen here.

Anyway here is the link to the bulletin with instructions.

 
#24 ·
So I did some digging around in my copies of the EPC and WIS about the rubber hose VS the zinc shim. It took me a bit as the EPC shows the zinc shim in the diagram but no part number is shown. In the WIS they show the rubber hose as well under the "normal" instructions for the springs and struts with no mention of the zinc shim.

But

If you dig around there is a button in the window of some WIS pages (second from the right) that looks like a piece of paper with an exclamation point on it.
When you click that when in the front suspension section of the WIS you will find bulletin # 731-2726 which I will post a link to below. In that bulletin it is very clear that the zinc shim is indeed the correct part to use (in the affected states at least) and the rubber hose should not be used at all.

I for one am astounded and humbled at the same time that this is not widely known. I have said for some time that the rubber hose is the newer part and I have been wrong all this time. My apologies to anyone who listened to me on this in previous posts. I was basically repeating what I had read in other posts without doing research beyond on the web. Anyway I find it strange that the EPC does not really call this out properly as well. I think that this is important enough that it should get put into the DIY section about struts and springs so the correct information is readily seen here.

Anyway here is the link to the bulletin with instructions.

https://app.box.com/s/h25a33wgia67rbnhvtvx
I always wondered why the consensus was that the hose took the place of the zinc spacer if the thought was that moisture was causing the corrosion. You'd think the hose would be trapping it. Either way, I think the actual problem is the spring and regardless of the type of spacer it will corrode.
 
#20 ·
On a side note when I did my front struts and springs I used only the rubber hose part so I guess some day I'll need to take it all apart againg and put the zinc spacer in. Live and learn.
 
#21 ·
Thanks for digging. I knew the saab parts guy was really good, but always smart to verify if you have access.

Still, look at my springs. Both were replaced under the warranty, both had the zincs, and both had the plastic coating worn with corrosion starting. The zinc may be helpful, but it doesnt solve other issues that are scary...

May be smart to go aftermarket if available in the correct rating... not sure how my galvanizing will help... but I hope it does...
 
#22 ·
Thanks for this post! I am in need of replacing my bearing on my right side (I've got an audible "clunk" when I turn the wheel left or right of center) but I was debating on waiting it out until I can get money to redo the suspension at the same time. Looks like that's probably a good idea...

Curious- is it necessary to buy the new mount too? Did you only do the 1 side (as in, if I'm already going to be in there to redo struts/springs, should I just do mount/bearing on both sides)? Also, where did you get the mount and bearing? I'm looking at the saabsite and eeuroparts
 
#23 ·
Yes, Id say that redoing the suspension is smart. At least replacing the struts, which are around $130 from Sachs/Saab and $230 for bilsteins.

My mounts were perfect. In hindsight I would have just reused them, as there wasn't even any sign of corrosion on them. Oh well.

Because I was swapping to Bilsteins, I had to swap both sides. If you were just replacing the bearing, it would be straightforward enough to just open it up, replace the bearing on the plastic bellows and then close it back up (assuming the strut was performing well and nothing was corroded).
 
#25 ·
Props to AvGuy for getting to the root of this ;ol;;ol;;ol;;ol;;ol;;ol;;ol;;ol;;ol;

The Delta use a plastic lower isolator but there is a recess in the lower strut plate for the spring coil end and the SAAB strut does not have that...so I will order up some zinc. Then I will coat it with green top rust check ( dont think you can find that in the USA) The bottom strut plate is a collector of dirt salt moisture anyway not sure anything will resist, regular cleaning / powerwashing in winter etc, would do the trick. There is a persistent salt line on the floor of my garage from the crap coming off the car; I wash the floor with water mixed with some ZEP industrial cleaner and vinegar.

Did I say how much I resent the salt they use, millions of tons, attempting to make the roads clean and dry, so folks can drive around with gay abandon on all season tires and pretend its summer.

ugh
 
#32 ·
I plan on doing this as I'm getting some crunching from my passenger front side strut over bumps.(Just started recently, and my springs were replaced via warranty just a few months ago)

Question being, what exactly all do I need to buy to do this?

I saw you have many things, including mounts, bellow, etc.

What all is completely necessary when this is done though? I hate to try and have someone do the shopping job for me but I'd love a list of parts that I need before I tackle this and find out I'm missing something like the bearing, or zinc washer or something.
 
#34 ·
Sway bars were replaced less than 5000 miles ago. If you are referring to this part.

Image


edit:

Sway bar links
Tie rod ends
Passenger side drive axle
coil springs

Those have all been replaced in the last 5000-10000 miles. I also have grease coming out of the top of my passenger side strut mount, not sure if it's related.