

Just went took went through this process during the 60k mile service on a 2006 9-3 aero and thought I would pass on my experiences. I was a little intimidated by the need for a subframe chassis brace in the factory guide, but my modified version went fine.
Specialty Tools:
E14 socket, 10mm, 16mm, 18mm sockets, 10mm wrench, 1/2" swivel, breaker bar, torque wrench. (assume you already have the usual array of extensions, torx bits, rackets etc.)
Factory belt: 93-185-756
1. Jack right front, place on floor stand and remove wheel. Remove fender liner.
2. Place floor jack and block of wood under right hand side of the sump. Jack as needed to remove weight off the engine mount you are about to remove.
3. Remove airbox cover, filter and the bottom half of the air box. You should see this:
![Image]()
4. Remove the 3 16mm hex bolts and 3 E14 bolts to remove the engine mount from both the engine and the car body. The E14 on the left of the image is hard to get to because of a coolant hose. Undo the 10mm bolt (black arrow) holding the coolant hose in place:
![Image]()
Then rotate the hose to get the access you need.
5. Then remove the AC pipe clamp (white arrow) from the front end of the bracket on the engine:
![Image]()
This is tricky as it is a tight space. The 10mm wrench got this done eventually. Then go to work on the 18mm bolts holding this bracket to the engine. The middle and rear bolts are straight forward. The one at the front (yellow arrow above) is difficult because of the AC piping in the way. I managed to move the pipes enough to get my regular 18mm socket and breaker bar (handle on an angle) in there. I think a 1/2" swivel would help here. After removing the bracket you should see the belt and tensioner (black arrow):
![Image]()
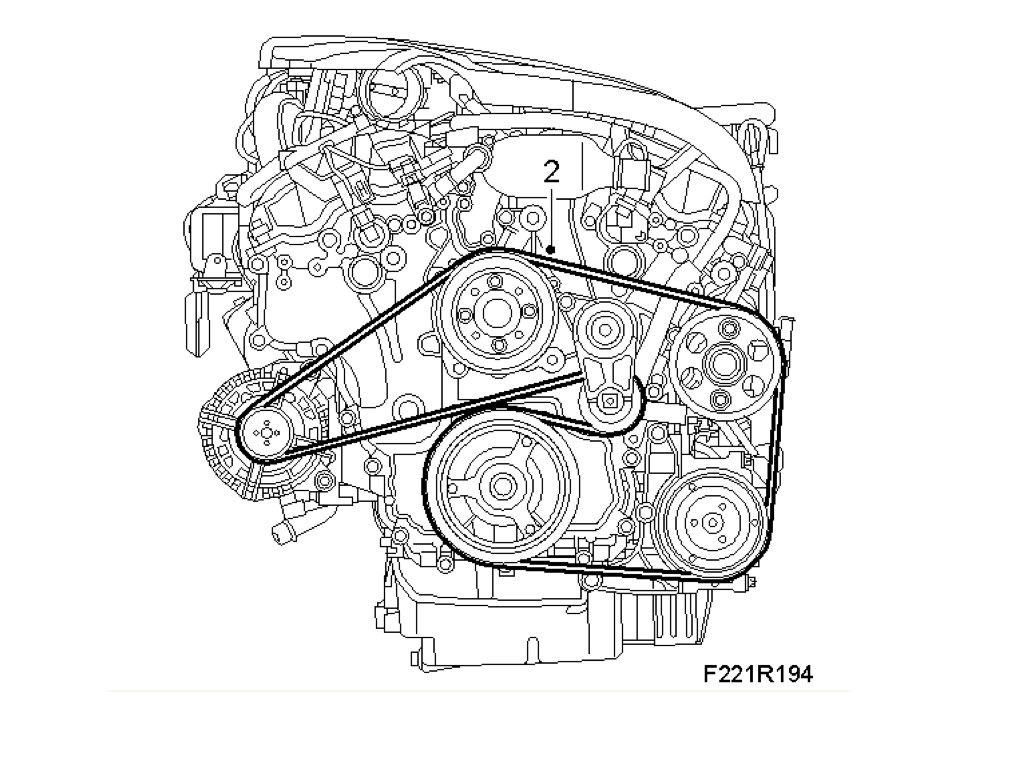
6. The 1/2 square hole is just out of shot. I managed (just) to get my regular 1/2 drive craftsman breaker bar into place between the car body and tensioner. Then just a matter of relieving tension on the belt and removing it from the pulleys from both the engine bay and the wheel well. It is a little tricky getting the belt around the tensioner. Do the reverse for the new belt. Make sure new belt looks like this and is well seated on all the pulleys:
![Image]()
Then work backwards from above.
7. Bracket to engine (18mm): 69 ft lbs, (93 Nm)
8. Reattach 10mm AC hose bolt.
9. Attach engine mount: You may need to adjust your floor jack at this point to line all the holes up.
Engine mount to engine bracket (E14): 33 ft lbs + 90 degrees (45 Nm)
Engine mount to car body (16mm): 37 ft ilbs +180 degrees (50 Nm)
Due to the space constraints I was unable to get a torque wrench on the front 18mm or rear E14 bolts so I had to guesstimate their torque. Not sure how the factory techs get around those ones.
10. Refit coolant hose 10mm bolt
11. Refit airbox, wheel well liner, wheel and put the car back on the ground.
Estimated time: 1st time and working at a leisurely pace: 2 hours.
Hope this helps someone out.
Specialty Tools:
E14 socket, 10mm, 16mm, 18mm sockets, 10mm wrench, 1/2" swivel, breaker bar, torque wrench. (assume you already have the usual array of extensions, torx bits, rackets etc.)
Factory belt: 93-185-756
1. Jack right front, place on floor stand and remove wheel. Remove fender liner.
2. Place floor jack and block of wood under right hand side of the sump. Jack as needed to remove weight off the engine mount you are about to remove.
3. Remove airbox cover, filter and the bottom half of the air box. You should see this:
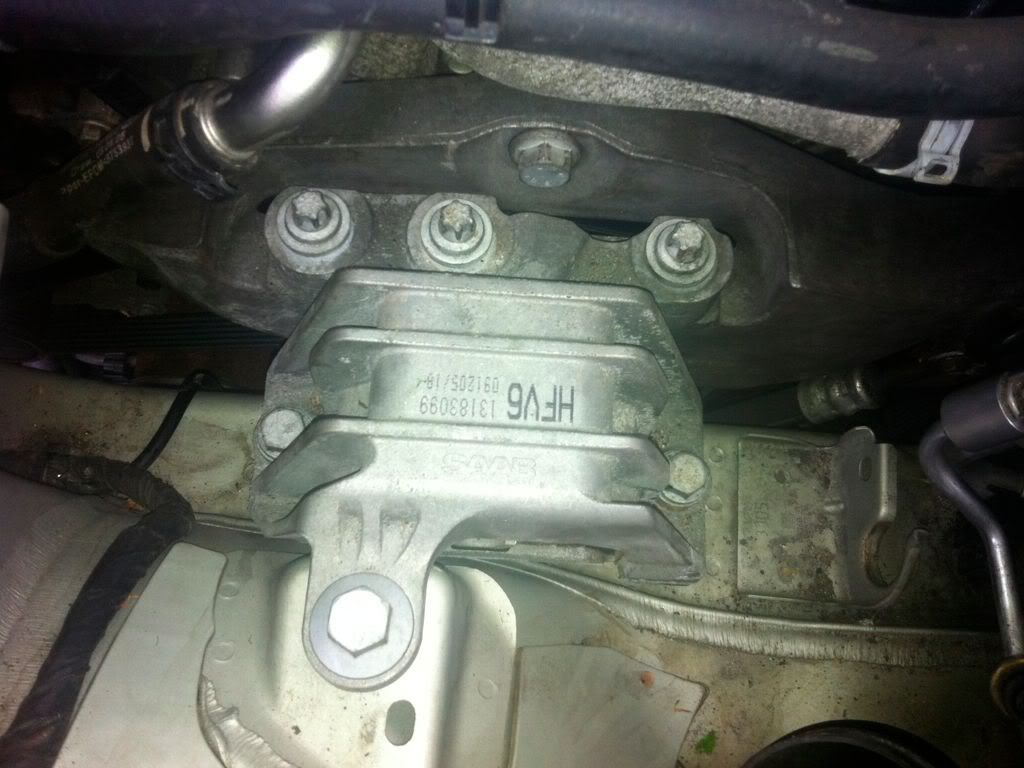
4. Remove the 3 16mm hex bolts and 3 E14 bolts to remove the engine mount from both the engine and the car body. The E14 on the left of the image is hard to get to because of a coolant hose. Undo the 10mm bolt (black arrow) holding the coolant hose in place:
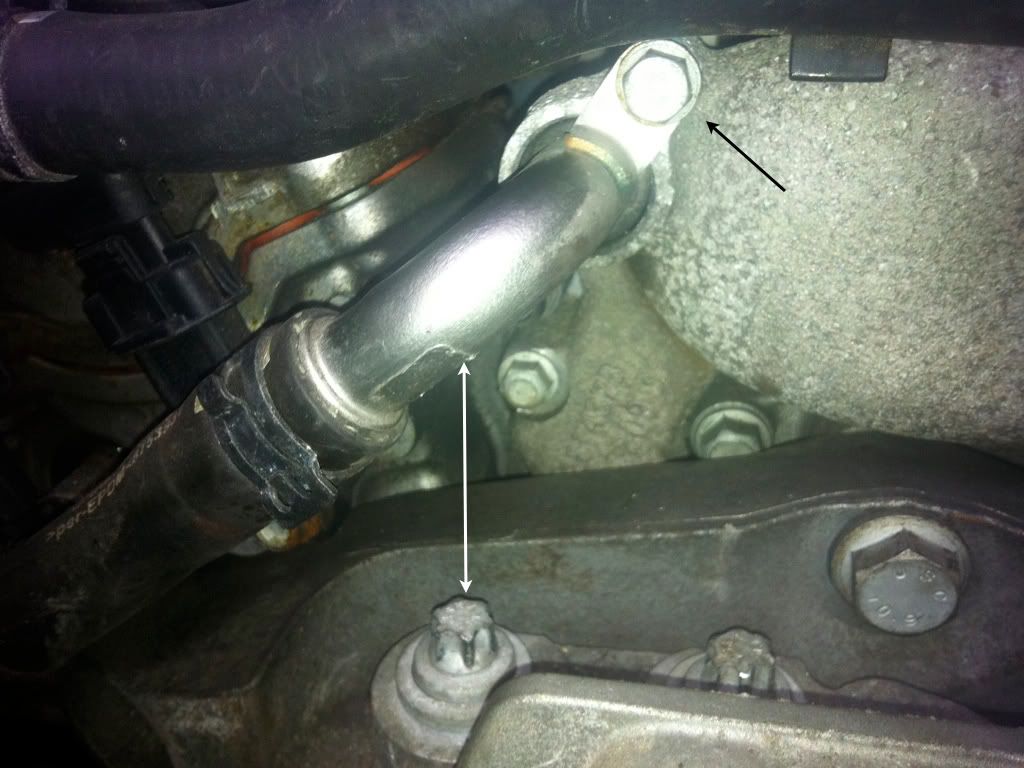
Then rotate the hose to get the access you need.
5. Then remove the AC pipe clamp (white arrow) from the front end of the bracket on the engine:
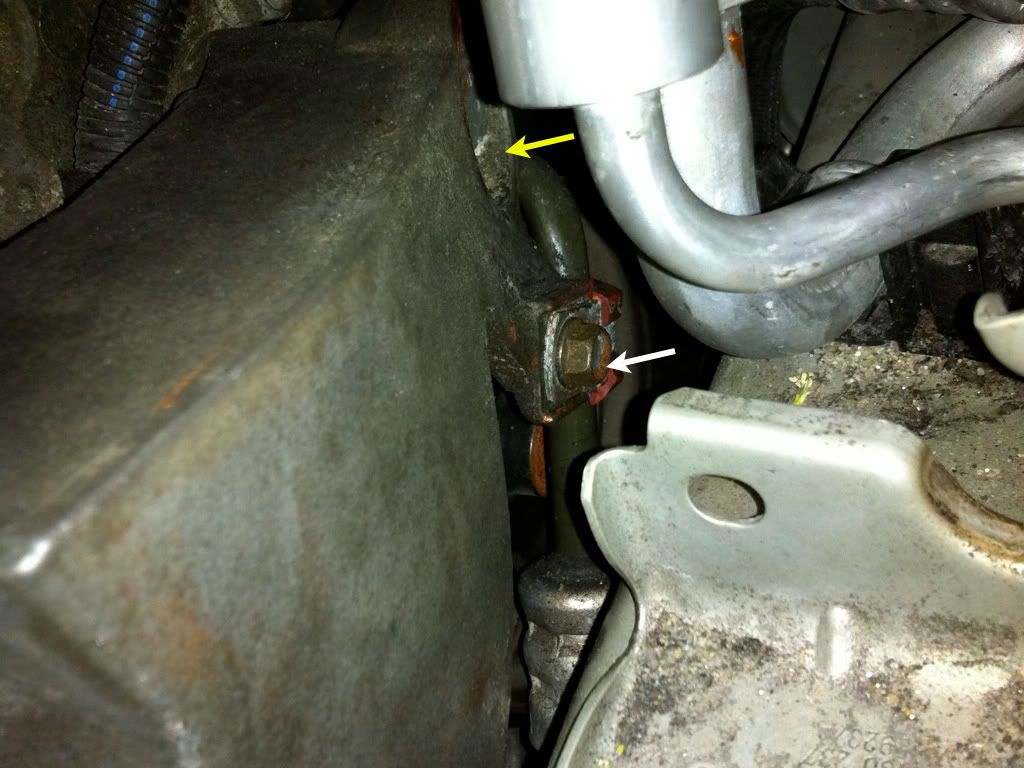
This is tricky as it is a tight space. The 10mm wrench got this done eventually. Then go to work on the 18mm bolts holding this bracket to the engine. The middle and rear bolts are straight forward. The one at the front (yellow arrow above) is difficult because of the AC piping in the way. I managed to move the pipes enough to get my regular 18mm socket and breaker bar (handle on an angle) in there. I think a 1/2" swivel would help here. After removing the bracket you should see the belt and tensioner (black arrow):
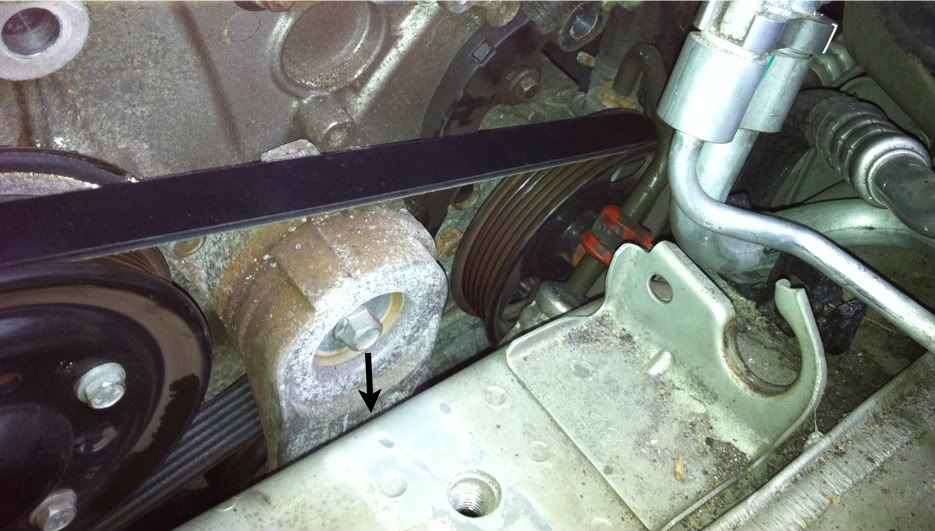
6. The 1/2 square hole is just out of shot. I managed (just) to get my regular 1/2 drive craftsman breaker bar into place between the car body and tensioner. Then just a matter of relieving tension on the belt and removing it from the pulleys from both the engine bay and the wheel well. It is a little tricky getting the belt around the tensioner. Do the reverse for the new belt. Make sure new belt looks like this and is well seated on all the pulleys:
Then work backwards from above.
7. Bracket to engine (18mm): 69 ft lbs, (93 Nm)
8. Reattach 10mm AC hose bolt.
9. Attach engine mount: You may need to adjust your floor jack at this point to line all the holes up.
Engine mount to engine bracket (E14): 33 ft lbs + 90 degrees (45 Nm)
Engine mount to car body (16mm): 37 ft ilbs +180 degrees (50 Nm)
Due to the space constraints I was unable to get a torque wrench on the front 18mm or rear E14 bolts so I had to guesstimate their torque. Not sure how the factory techs get around those ones.
10. Refit coolant hose 10mm bolt
11. Refit airbox, wheel well liner, wheel and put the car back on the ground.
Estimated time: 1st time and working at a leisurely pace: 2 hours.
Hope this helps someone out.
")


