SaabCentral Forums banner

Window Roller Repair (with pics)

135K views 154 replies 75 participants last post by  photousa  
#1 ·
Just Broke the Roller on my passenger side and I had the time to take photos during the repair…


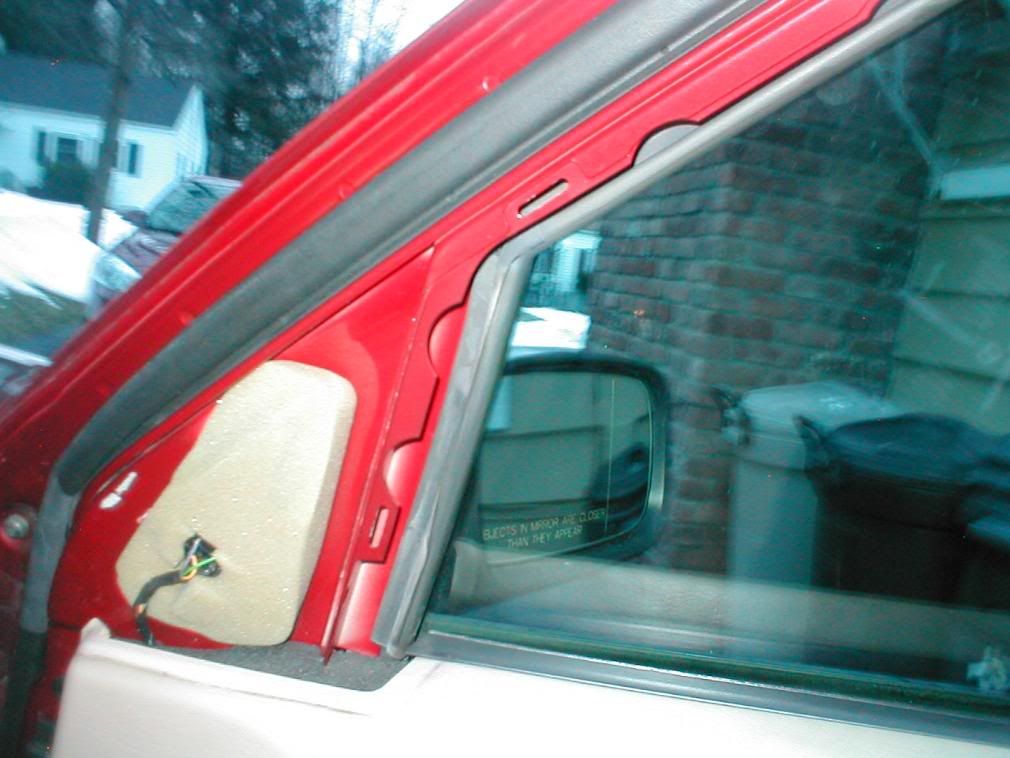
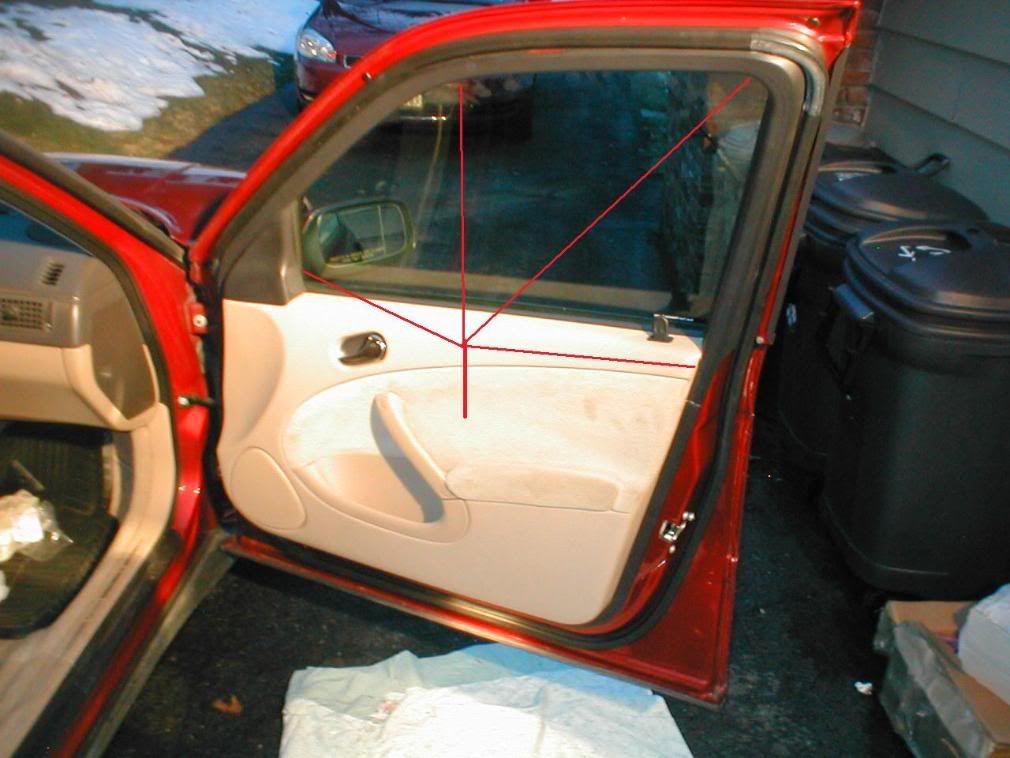
First I removed the upper trim from around the window:

Image


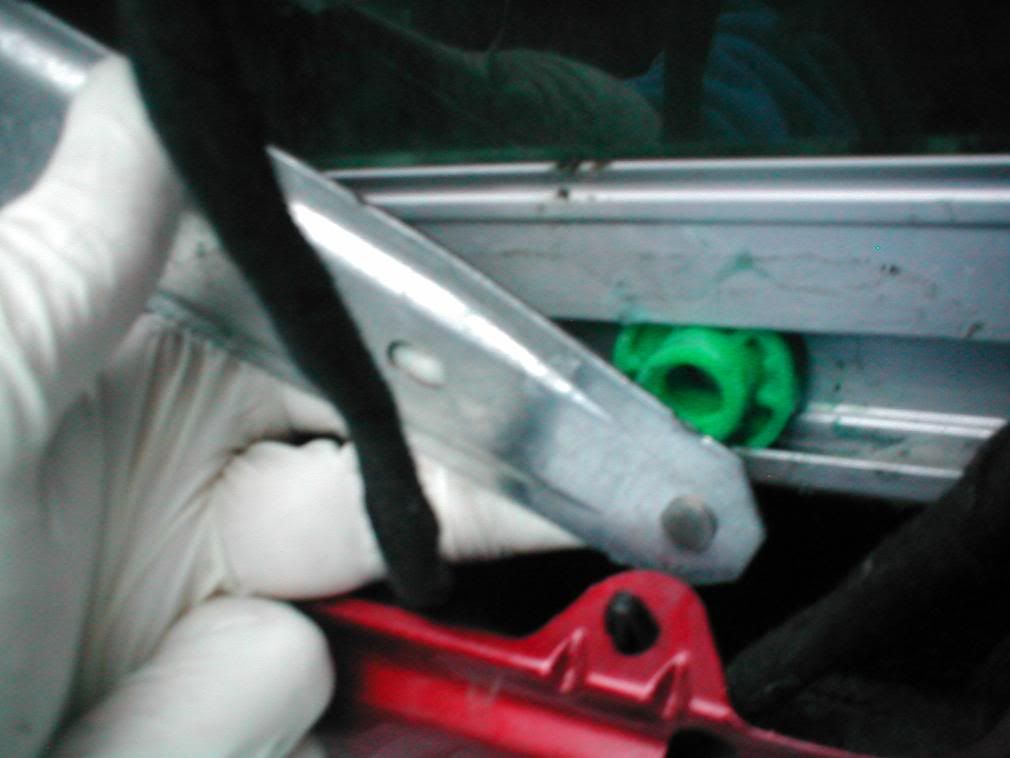
I used a Screw Driver to carefully pry the clips out of the holes in the door frame. I couldn’t get a good pic of the clips but here is a pic of a couple holes – there are about 7 or 8:

Image


#2 ·
Continued(1)...

Next, I removed the bolt covers with a very very small screw driver:
Image


The Bolts are T30 Torx and pretty far in. I used this to help me out:
Image


After removing the handle (tilt the non hinged side away from the door) I then moved to the bottom of the door and removed the press stud and popped the light back behind the door panel. I then moved around the panel and pried the panel from the door. These are the studs that are on the panel:
Image


Here is where they are on the panel:
Image
 
#3 · (Edited)
Continued(2)...

I got stuck at this point. The panel was still attached at the top of the door. I pulled the top of the panel straight out from the black trim at the top of the door.

Image


Upon re-assembly, I found this to be a problem. I lifted the black trim straight up, and found these two alignment notches on the door frame:

Image


The difficulty was in getting the trim back onto the panel. I started at one end:

Image


And slid it on the rest of the way:

Image
 
#4 · (Edited)
Continued(3)...

I then sliced the glue holding on the water barrier with a knife. On re-assembly, the sliced glue on the barrier stuck well to the sliced glue on the door:

Image


Now to the business at hand. Here is the roller that broke next to a new one. Knowing the orientation of the oval shape will aid in the replacement of the cotter pin:

Image


Here’s what I started with. The Broken roller is hidden by the lift:

Image


I slid the broken roller to the left and off of the track. I greased up the new roller with this and slid it in from the left.

Image
 
#5 · (Edited)
Continued(4)...

I had to pull the lifter arm back…

Image


Very Carefully adjust the height of the window, and move the roller in order to line up the pin on the lifter with the hole in the roller:

Image


I pressed the pin into the roller with this:

Image


I then put the cotter pin on (check for alignment with the oval, grab the circle with needle nose pliers and pull it home) and tested the window:

Image
 
#6 ·
Continued(5)...

I wish I could say that this was it. Apparently my window had come off of the track. There was a lot of resistance on the window when working the electronic controls.


I checked the WIS and it had a picture of tilting the front of the window down and lifting the back of the window to remove it from the door.


So I disconnected both rollers (sorry no pics, I was using too many four letter words at this point), and lifted the window as demonstrated by the WIS. When I did this I found a plastic piece inside the door (towards the lock) that was floating around. I tried several orientations of this piece and was finally able to pull the entire window up to its closed position.


At this point I lowered the window by hand in its correct orientation to the lift mechanism.


I then reconnected the lifter arms and tested the electronics and it worked!


At this point re-assembly was the reverse of removal. Remember to re-thread the door light back through the water barrier if you took it out:

Image


I also recommend lining up the plastic pins on the panel with the holes in the door before pressing them home. You could end up with broken pins and a rattling door panel:

Image
 
#9 ·
NIce write up Al.


I have done a few of these now( most recently on my neighbor's 99) Here's a couple of now that I have done it how can it be easier points.

1. you do not have to remove the top window frame plastic bits, you can jsut remove the door panel by prying up at the clips.
2. To keep the top plastic part on just lift the whole panel assembly UP, it will stay to gether, the top platic part hangs on a ledge on the top of door ( where the alignment points are.)
3. You can put the cotter pin on the roller and slide the roller into the frame. Then the pin from the regualtor will just snap in, pin in place and all.
4. Use soem type of glue ( silicone caulk perhaps) to attach teh windo guide that you found insode flaoting around in place. It is originally held in palce with some type of sealer and it drys over time and falls out caousing the problem you see here. If you did not, it can fall out of place again and casue the same binding and roller failure you had. ( Ask me how I know this one too)

You got the rest spot on for a first timer!
 
#10 ·
Thanks...

2. To keep the top plastic part on just lift the whole panel assembly UP, it will stay to gether, the top platic part hangs on a ledge on the top of door ( where the alignment points are.)
Thanks for mentioning this. I failed to mention that I would do this at my next opportunity. I got so wrapped up in posting the solution to my own problem, that I forgot to mention how to avoid it! ;oops:

4. Use soem type of glue ( silicone caulk perhaps) to attach teh windo guide that you found insode flaoting around in place. It is originally held in palce with some type of sealer and it drys over time and falls out caousing the problem you see here. If you did not, it can fall out of place again and casue the same binding and roller failure you had. ( Ask me how I know this one too)
Where and how would you do this? It didn't look like something that I could do because there wasn't access into that part of the door...

I checked the EPC and the WIS and neither mention this piece. I know its there though, because I saw it! I could only see it by looking down through the window slot. from the top of the door.

The only place I've seen it mentioned is in the haynes version of the Window adjustment instructions. It says to "push the glass firmly to the rear so that its rear edge is fully engaged in the rear channel." However this could be interpreted as the channel in the rubber weather strips so I'm not sure... :confused:

Here's the EPC pic of the front door - Is that piece on there?
Image


Also - here are the adjusment instructions from the WIS with two different pictures:
Image

Image
 
#17 ·
copakeman said:
Al's Red Wagon, thank you very much. I have a 2000, 9-5 wagon that the passenger side window stopped working on 5 months ago. Your pics and explanations were excellant in helping making an easy job stay easy. Thank you again. Great job.
c
No Problem - It's good to hear some positive feedback...:cheesy:
 
#18 ·
No problem giving thanks when it's deserved.

The car belongs to my daughter, who is now out of the country for quite a few months. while she was living in my house, she did not want me to fix it. that's why it was broke for many months. i took the cover off, saw the broken roller and went to the internet to find a how-to. i hit the jackpot. thanks again.
c
 
#19 ·
Thanks

Appreciate the info here. There were many white pieces of plastic in the base of the right rear door when I finally got the panel off with the help found here. Since the car has almost 200K on it and I never ride in the back, I cut a piece of wood the right length to prop the window in the full up position, then tie wrapped it to the regulator so it would not move.

A cob repair if there ever was one.
 
#20 ·
I did this the other day, found out that i didnt have the green rollers but white square one (not rly rollers now are they!). Anyone else had these? Or has someone repaired in the past and done something wrong?

Also, during my repair i found that the left arm had been bent so i had to bend it back... :confused:
 
#24 ·
Excellent write-up with great pics... the one thing I discovered when doing this DIY a few weeks ago was many times the rubber gaskets on the right and left side inside the door frame tend to fall out... You'll know this has happened when you have your window down while driving and you can hear a vibration of glass hitting steel- Not very loud, but distinct. You just need to replace these rubber linings which fit into the tracks and it becomes as good as new :D
 
#36 ·
(warning: stupid question ahead) So, if I'm experiencing this symptom, do I have to take the door apart to re-attach these rubber gaskets? Also, do I need to REPLACE these (as in "buy new ones in advance, remove the old, and install newly purchased ones") or just "re-install" the existing ones that have fallen off?

Thanks in advance!!!
 
#25 ·
Al's Red Wagon said:
No Problem - It's good to hear some positive feedback...:cheesy:
Hey Al, another great thread from you! I discovered this right after the four-letter part of my window reinstall :cheesy: . Glad to hear I'm not the only one that had to remove the rollers and start over.

The replacement of rollers is way more complicated than it needs to be. The clips on the rollers have to be inserted inside of the regulator arms and that just ain't right. It is very troublesome to slide the clips into a space you can't see. An offset needle-nose pliers is your best buddy on that.

My feeling is that some of these engineers that don't think through maintenance, accessability for repair, and the actual repair operation should be sentenced to a few days inside their creations performing repairs. [/rant]

Thanks again, Al. Keep up the good work.:D
 
#26 ·
Your pictures told the story

Thanks for posting how to fix the window roller. I disassembled everything and found the same broken green roller as in your pictures. Got a new one off the Internet and will install it shortly. I will pay attention to the alignment of the window in its guides, like you describe.

I appreciate being able to see the job first hand from your posting.